Setting Up Webpack, Babel, and Sass for a Modern JavaScript Development and Production Builds.
What is Webpack, and why would you need it ?
Webpack, is a module bundler for an app. Think about it as a tool that will combine all assets (scripts, css, modules…). Module bundlers are important because they optimize resources. Think Minification and compression, code splitting and more. They also streamline the development experience.
During this tutorial We’ll learn how to setup Webpack with Babel and Sass for a modern JavaScript experience. At the end We will have a modern configuration that covers essential best practices for production and development. To understand this tutorial you will need to have node.js and npm installed. A basic knowledge of JavaScript and terminal commands.
Why Webpack and not something simpler ?
Webpack offers a vast plugin ecosystem, and many large companies are using it. It also has a massive user base, and offers a high degree of configurability. So if you ever plan on working on Legacy systems, Eject your create-react-app for whatever reason, or to understand what is going on under the hood. You will need to understand Webpack.
Initializing the project
Let’s begin by defining the folder structure of our app. A simple one would be to have:
One src folder containing:- A JavaScript folder, holding all scripts and javaScript files of our app
- A Scss folder, holding all stylesheets
- A Html folder, holding our Html files -
One configuration folder containing:- webpack.config.js (entry point of our configuration that We’ll pass to package.json)
- webpack-common.js (common dependency for development and production)
- webpack-dev.js (development configuration)
- webpack-prod.js (production environment)
The root folder will contain the rest of the files such as package.json, .BabelIrc, etc.
Let’s take a look at the following image :
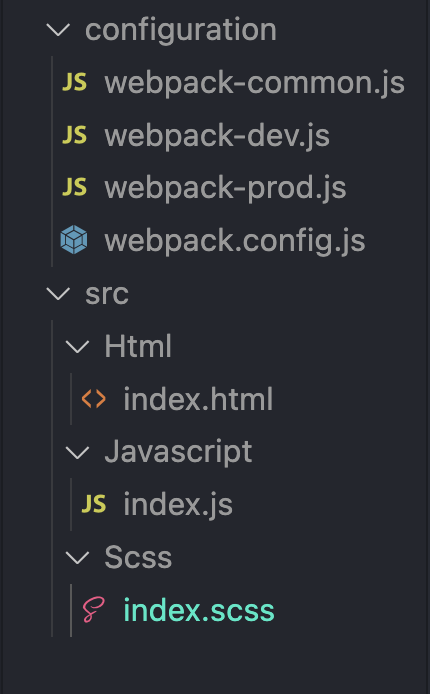
I’ve added an index file in each folder in the src folder to have a better representation of how things will look like. Now We can initialize our project with the following command.
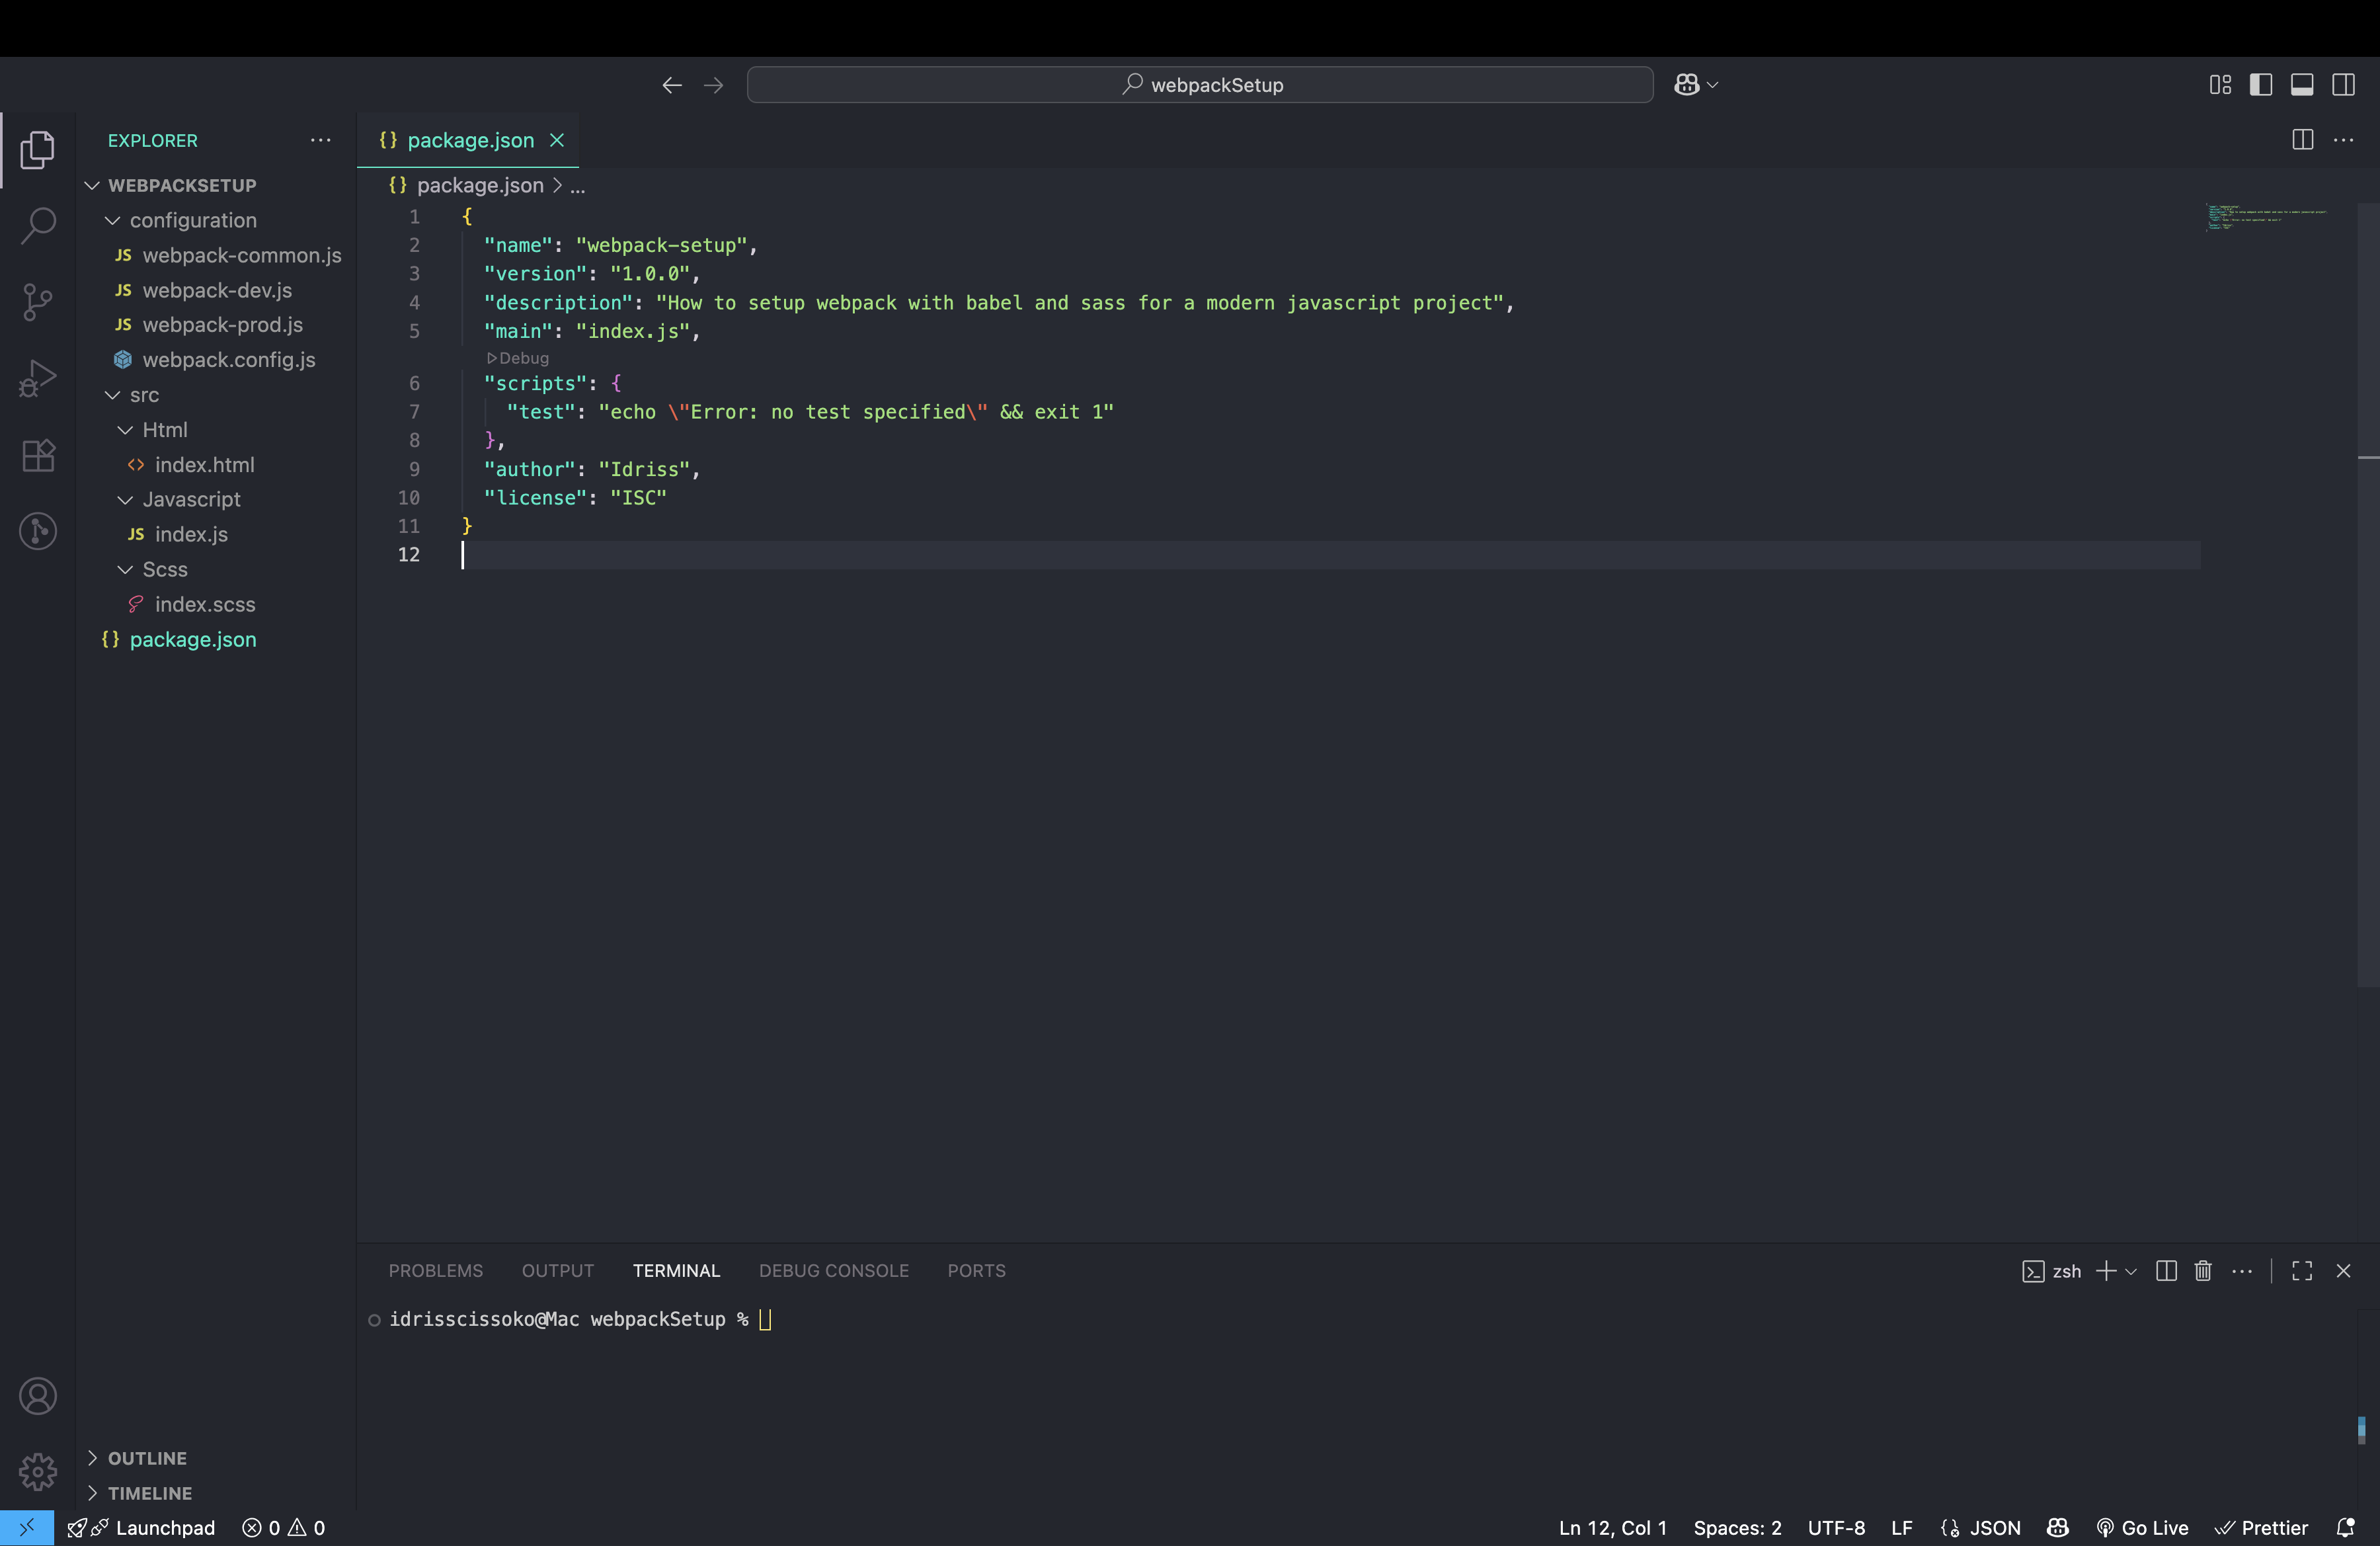
npm init
You can fill it up based on your project characteristics. What’s important here is configuring Webpack, not the actual project.
Once done We’ll get our package.json file.
Now our project folder looks like this :
 Next We can install the dependencies we will need for our setup.
Developer Dependencies
Babel
We will use Babel to transpile our modern JavaScript (ES6+) into older versions compatible with more browsers.
- “@babel/core”: The engine, the core library of Babel, that will give us the fundamental functionality of transforming and converting our code.
- “@babel/preset-env” : This will determine automatically which language features are supported by the target environment and transforms it to compatible code
- “babel-loader” : This plugin will help us or be the bridge that will allow us to use Babel within Webpack build process.
Let’s add the previous developer dependencies with the following command :
npm install --save-dev @babel/core @babel/preset-env babel-loader
Webpack
Next We’ll install the Webpack dependencies we need.
- “webpack”
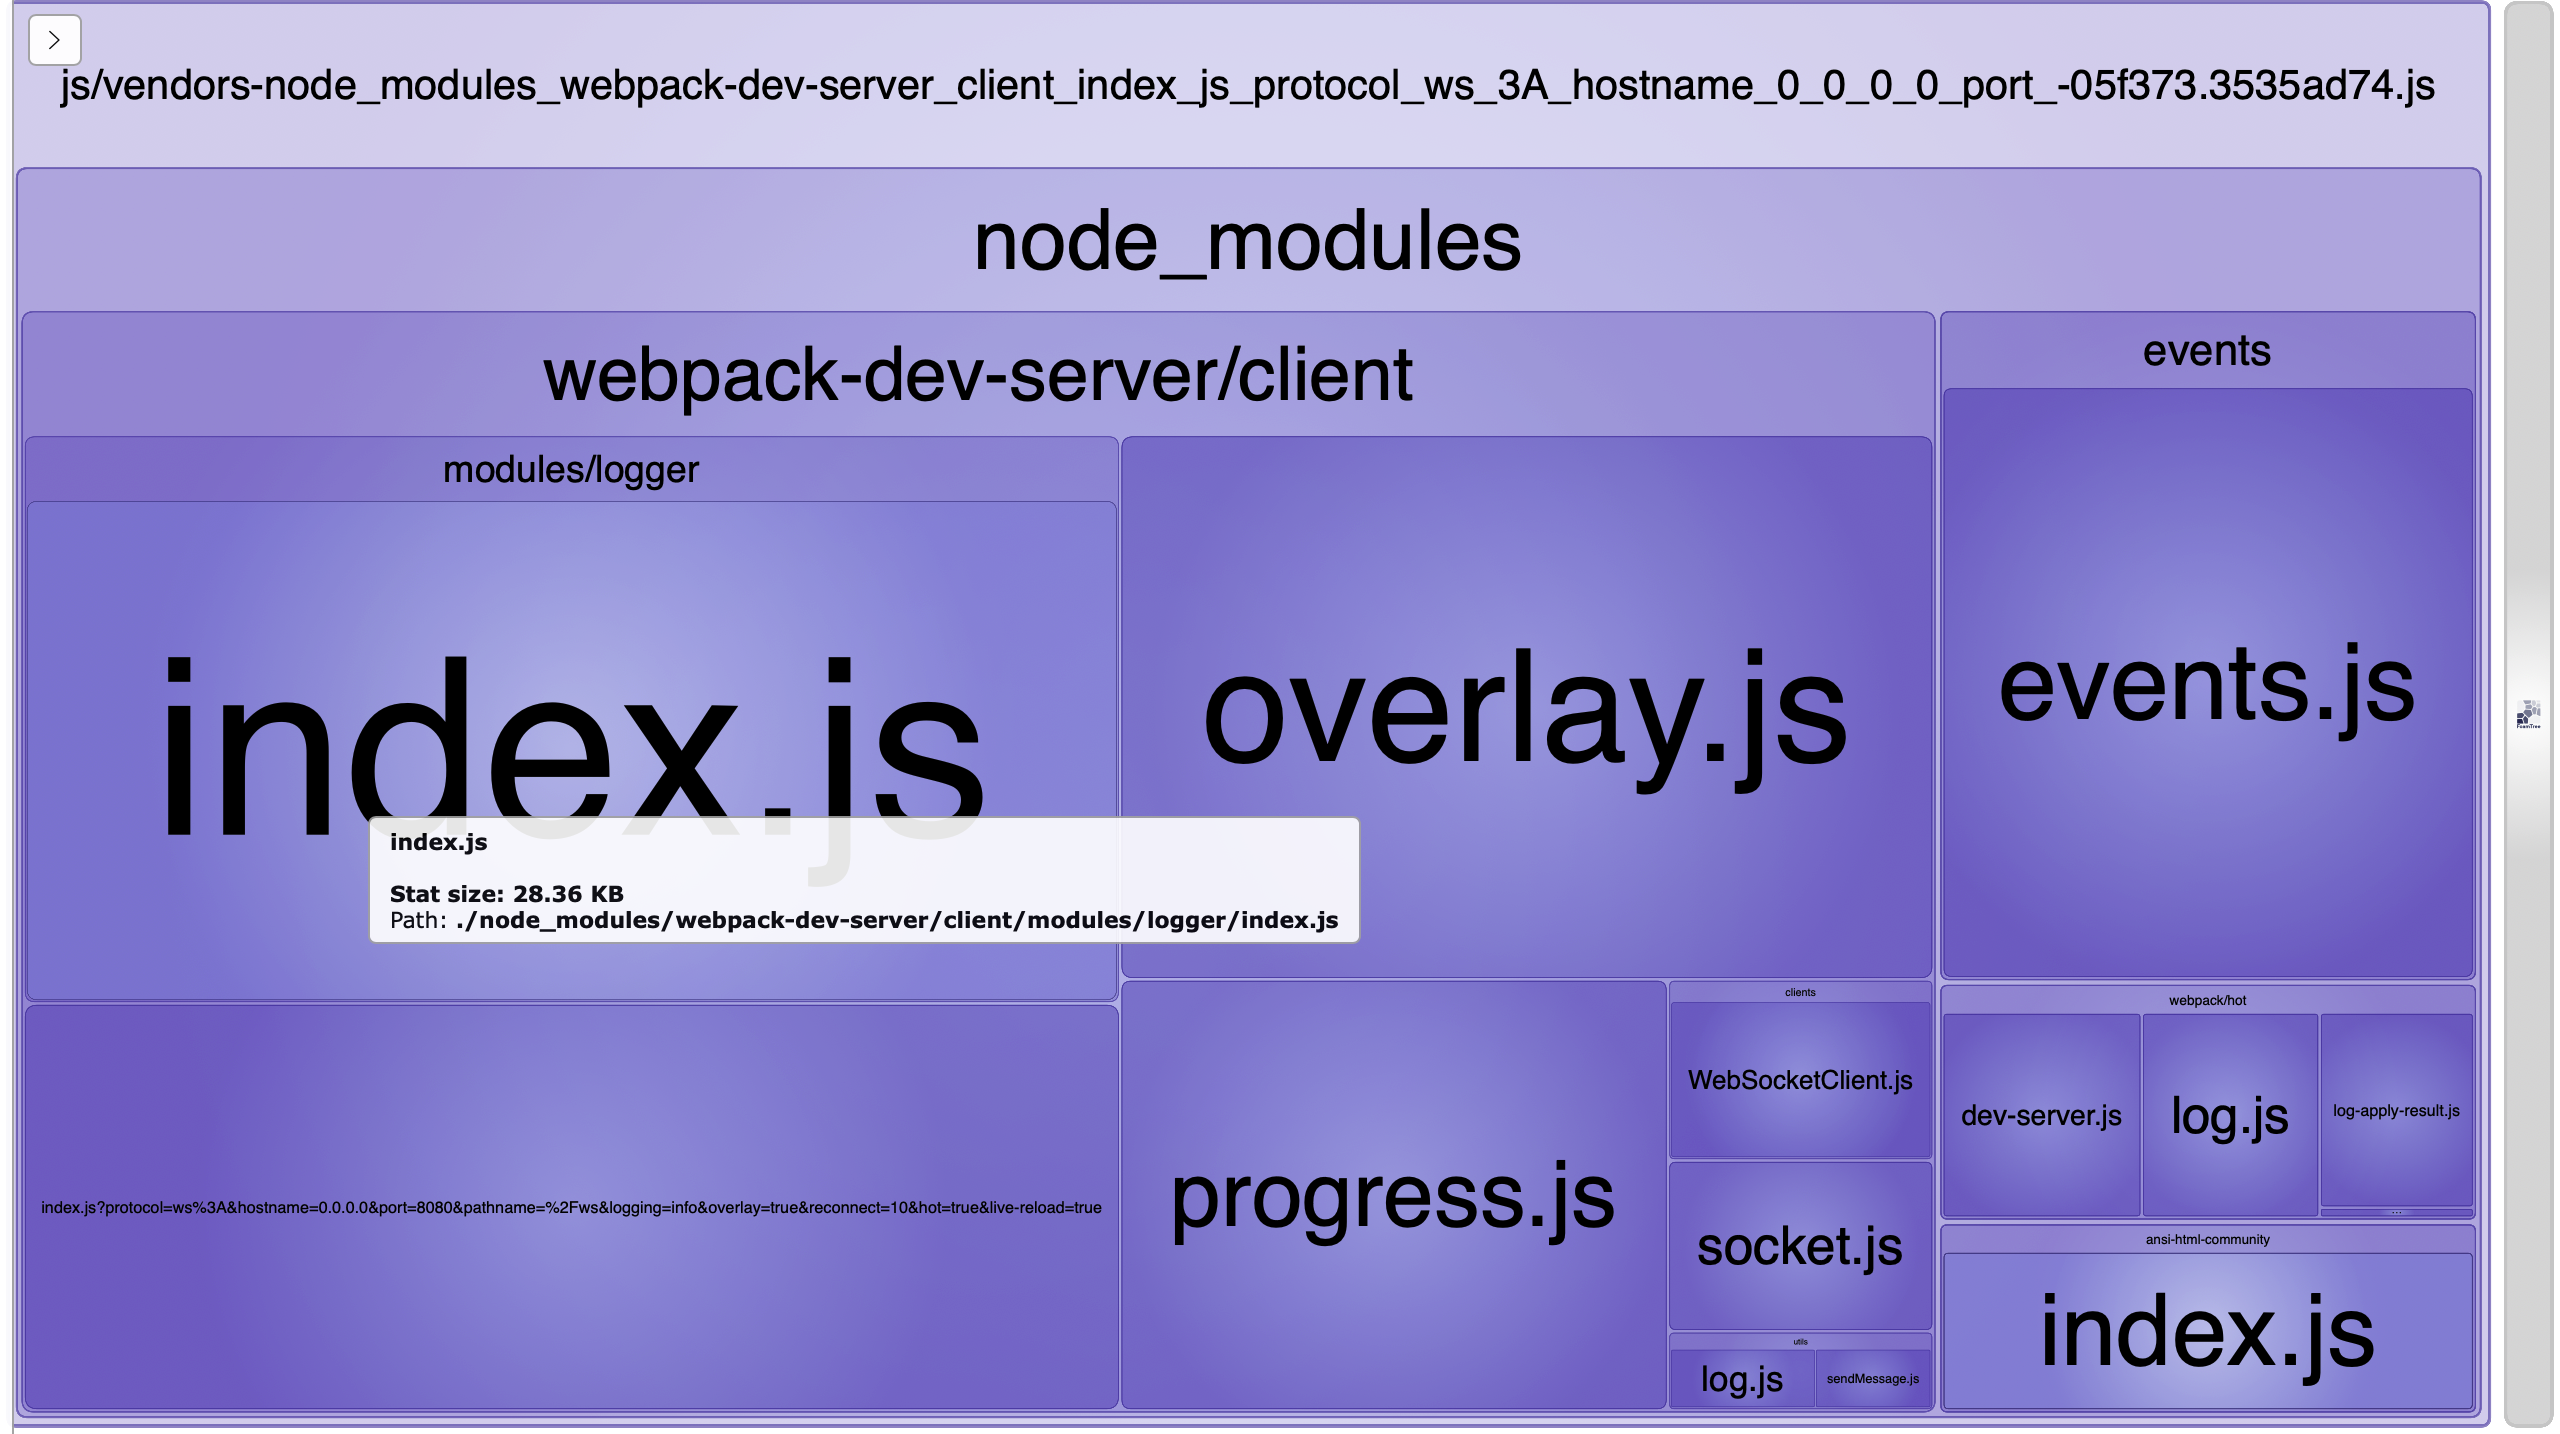
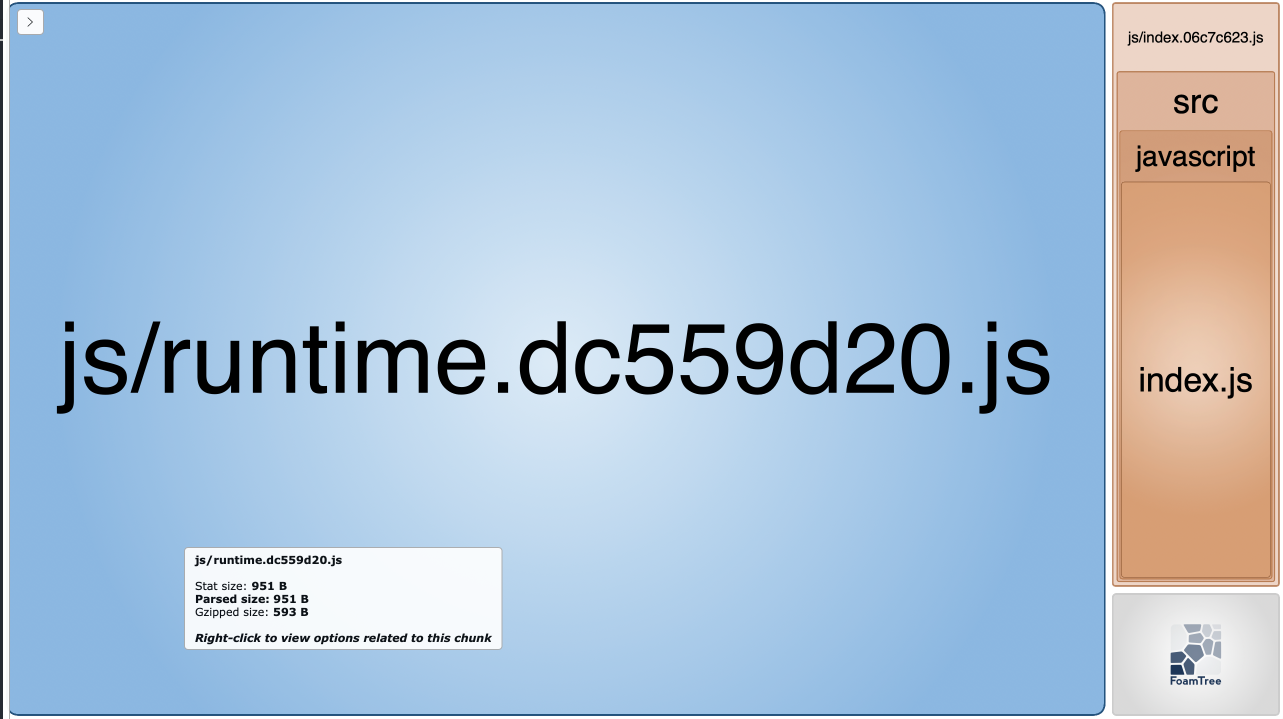
- “webpack-bundle-analyzer”: Like the name suggests it will help us figure out what modules make up the most of the size of our bundles by showing us a treemap.
- “webpack-cli” : We use this to configure and run Webpack
- “webpack-dev-server”: This will start a development server for our application, and automatically reload when we make changes.
- “webpack-merge”: will allow us to combine aka merge different configuration files, making it easy to manage different environments and configurations.
- “clean-webpack-plugin” : Cleans the output directory before each build, so we have a fresh start each time.
- "html-webpack-plugin: Generates HTML files.
Run the following command :
npm install --save-dev webpack webpack-bundle-analyzer webpack-cli webpack-dev-server webpack-merge clean-webpack-plugin html-webpack-plugin
How do Babel and Webpack work together ?
Webpack processes the JavaScript files, while babel-loader intercepts them and passes them to Babel. The babel/core parses the code and analyzes the syntax then the babel/preset-env determines the necessary transformations based on the target environments. Babel applies the appropriate transformations to the code and Webpack includes the transformed code in the bundle.
Styles and other dependencies
Next on our to-do list are the style and other dependencies. In the nutshell We have :
- “css-loader”: Allows us to use CSS modules
- “html-loader”: Loads HTML files as module so we can include them in our JavaScript Code.
- “mini-css-extract-plugin”: Allows us to extract css files into separate files to improve performance and also reduce bundle size
- “sass-loader”: This will process our SCSS/Saas files, so we can use variables, mixins, etc.
- “style-loader”: Needed in development to dynamically inject CSS into the DOM
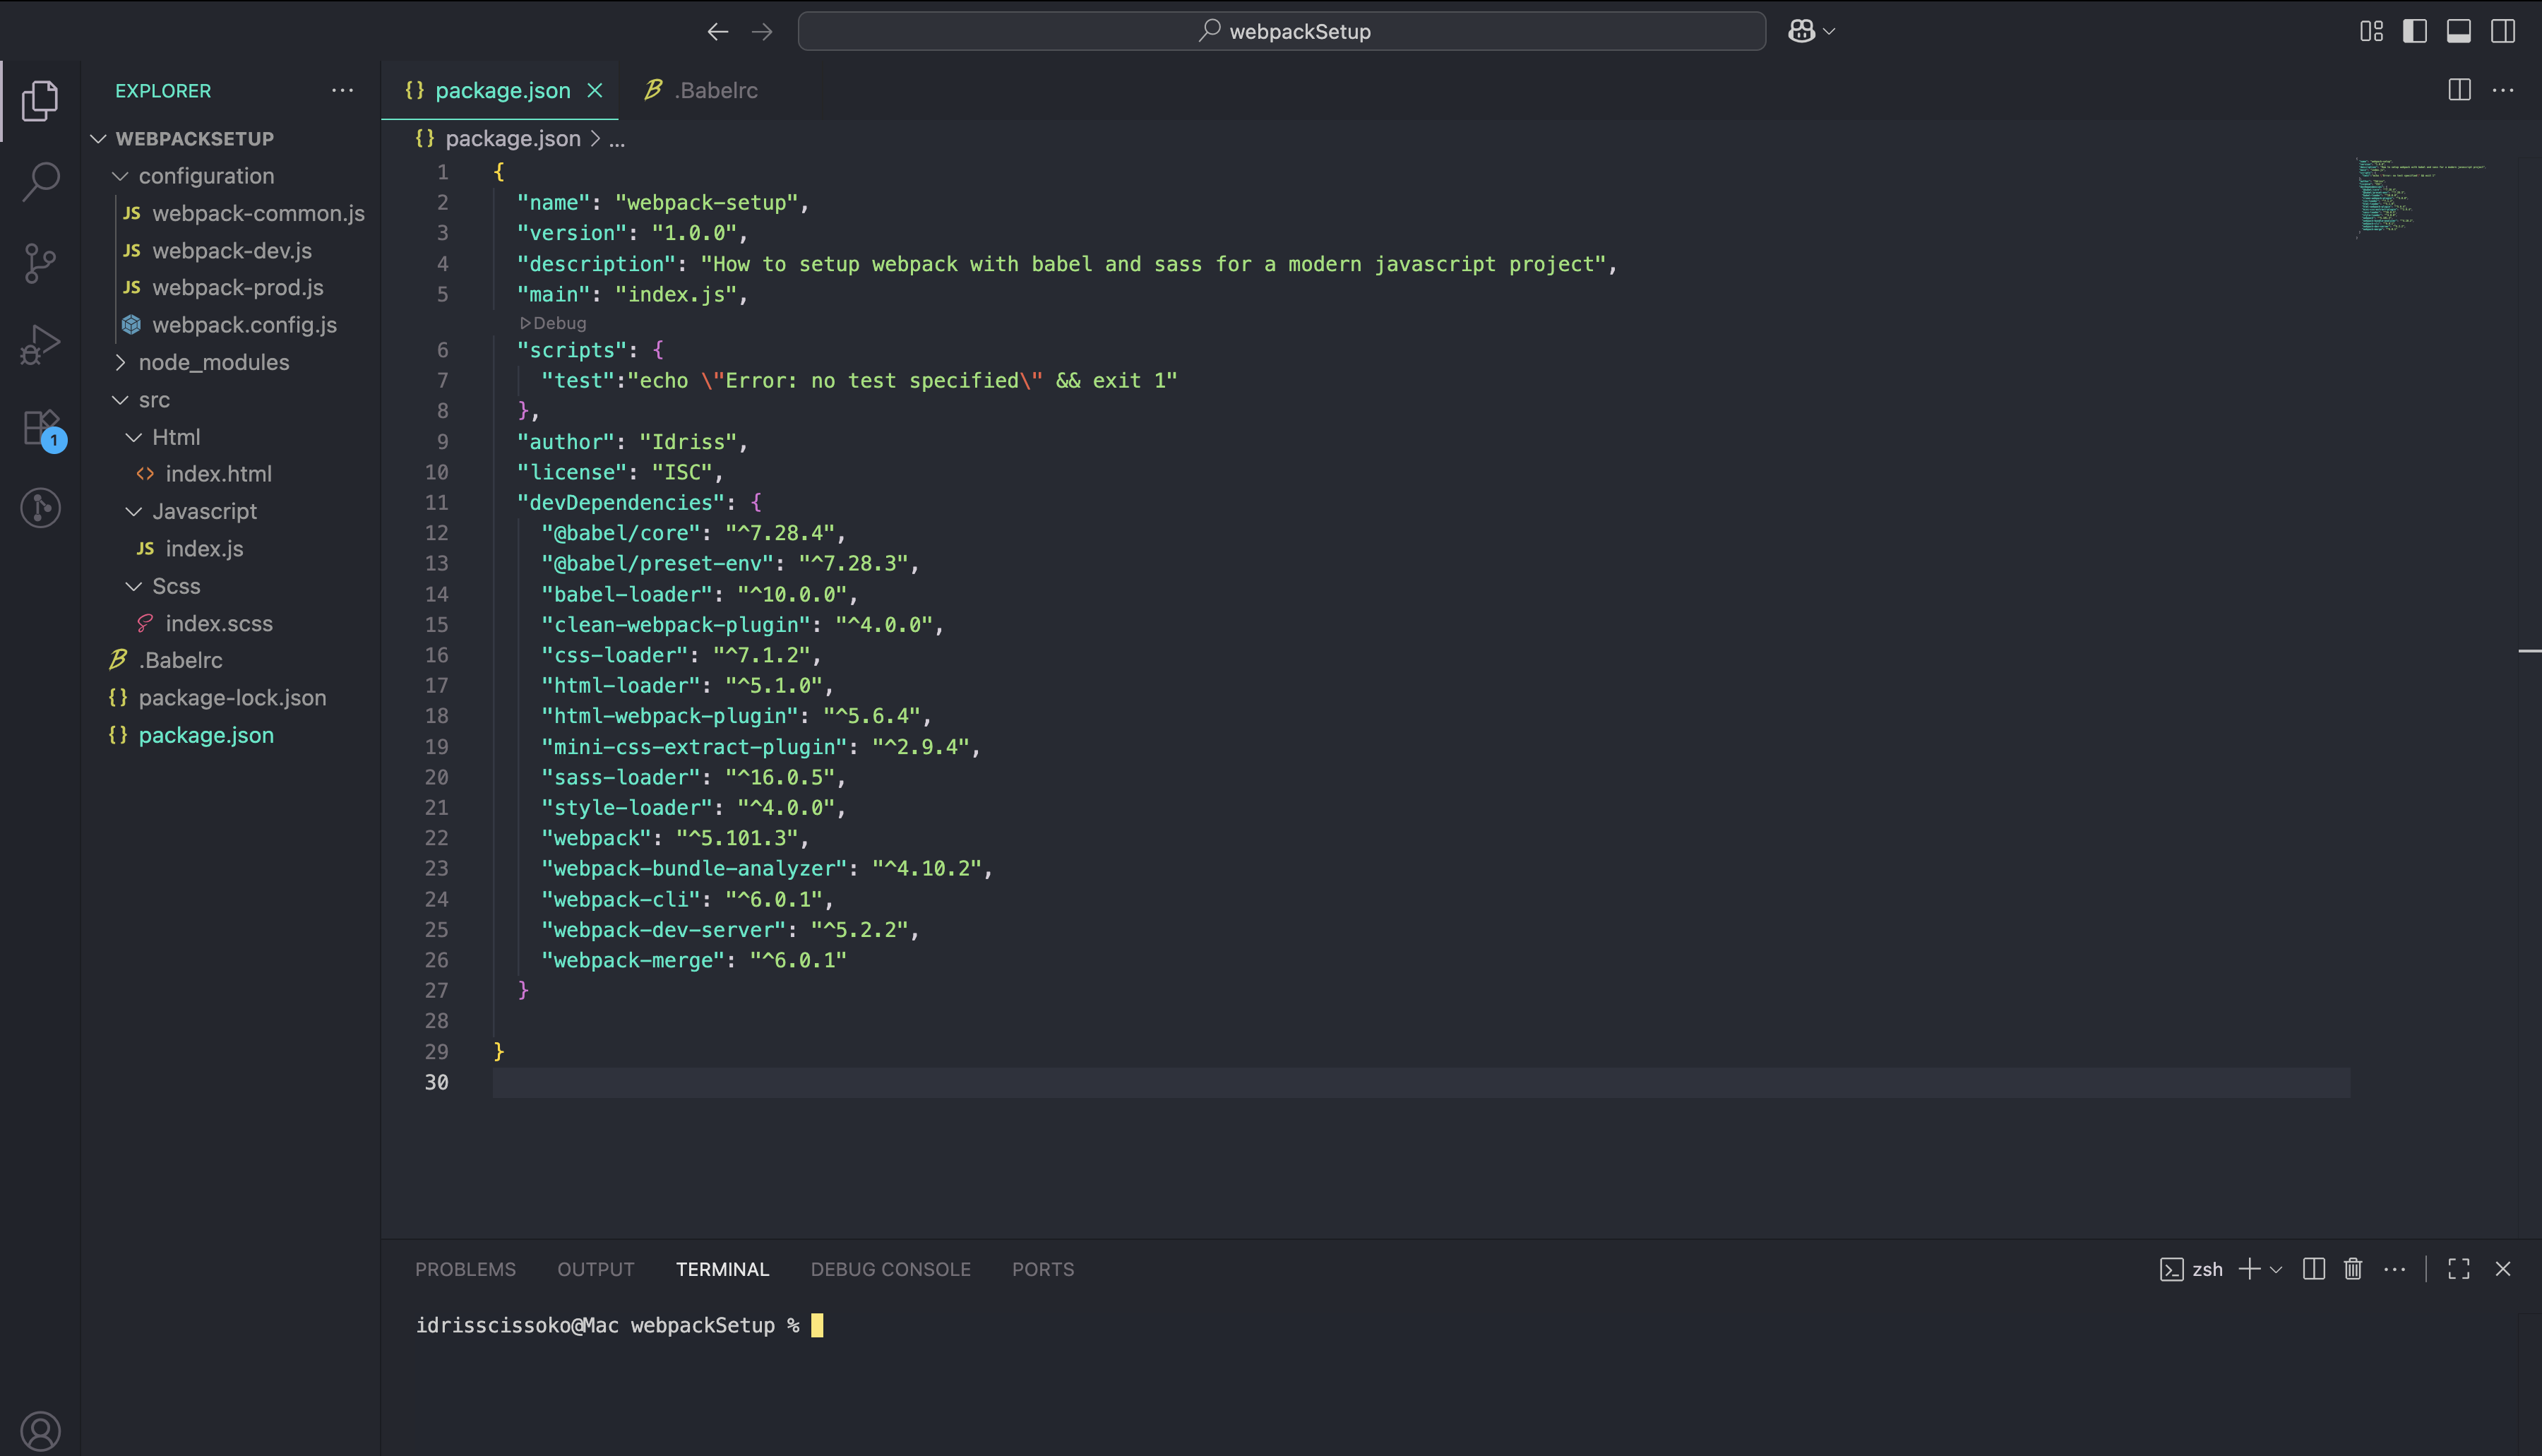
npm install --save-dev css-loader html-loader mini-css-extract-plugin sass-loader style-loader
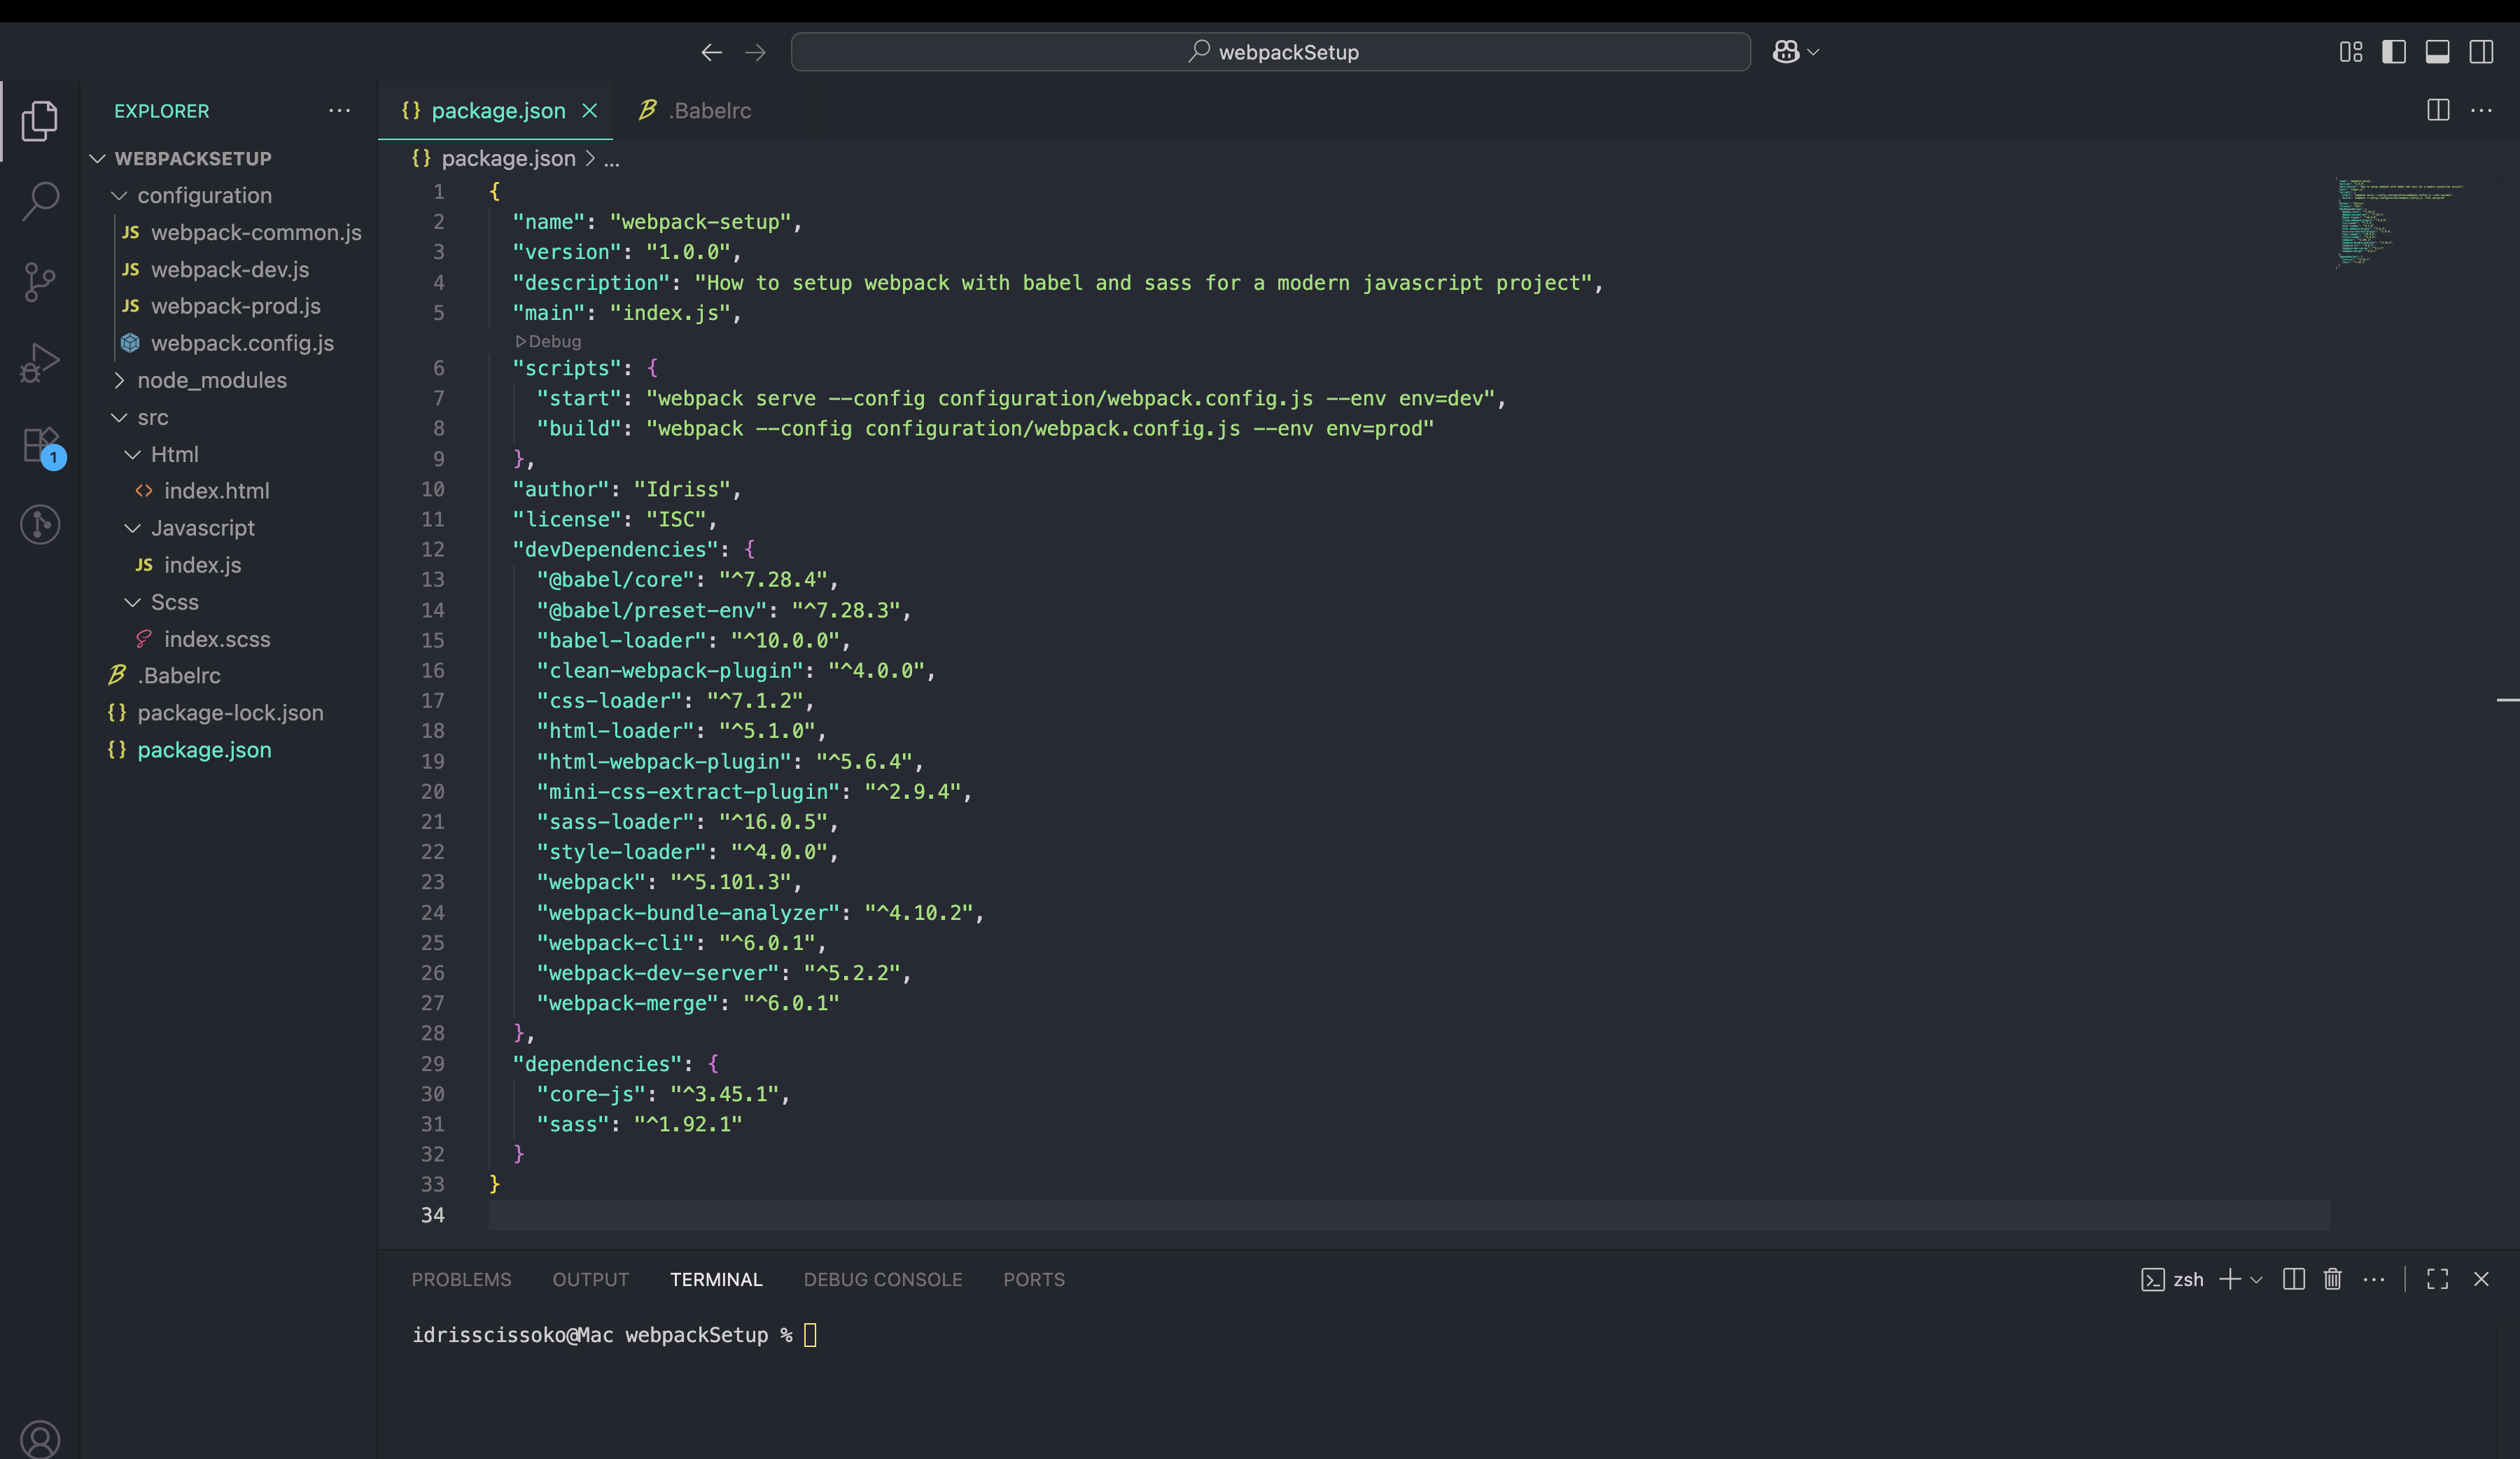
Our package.json file looks like this now:
Dependencies
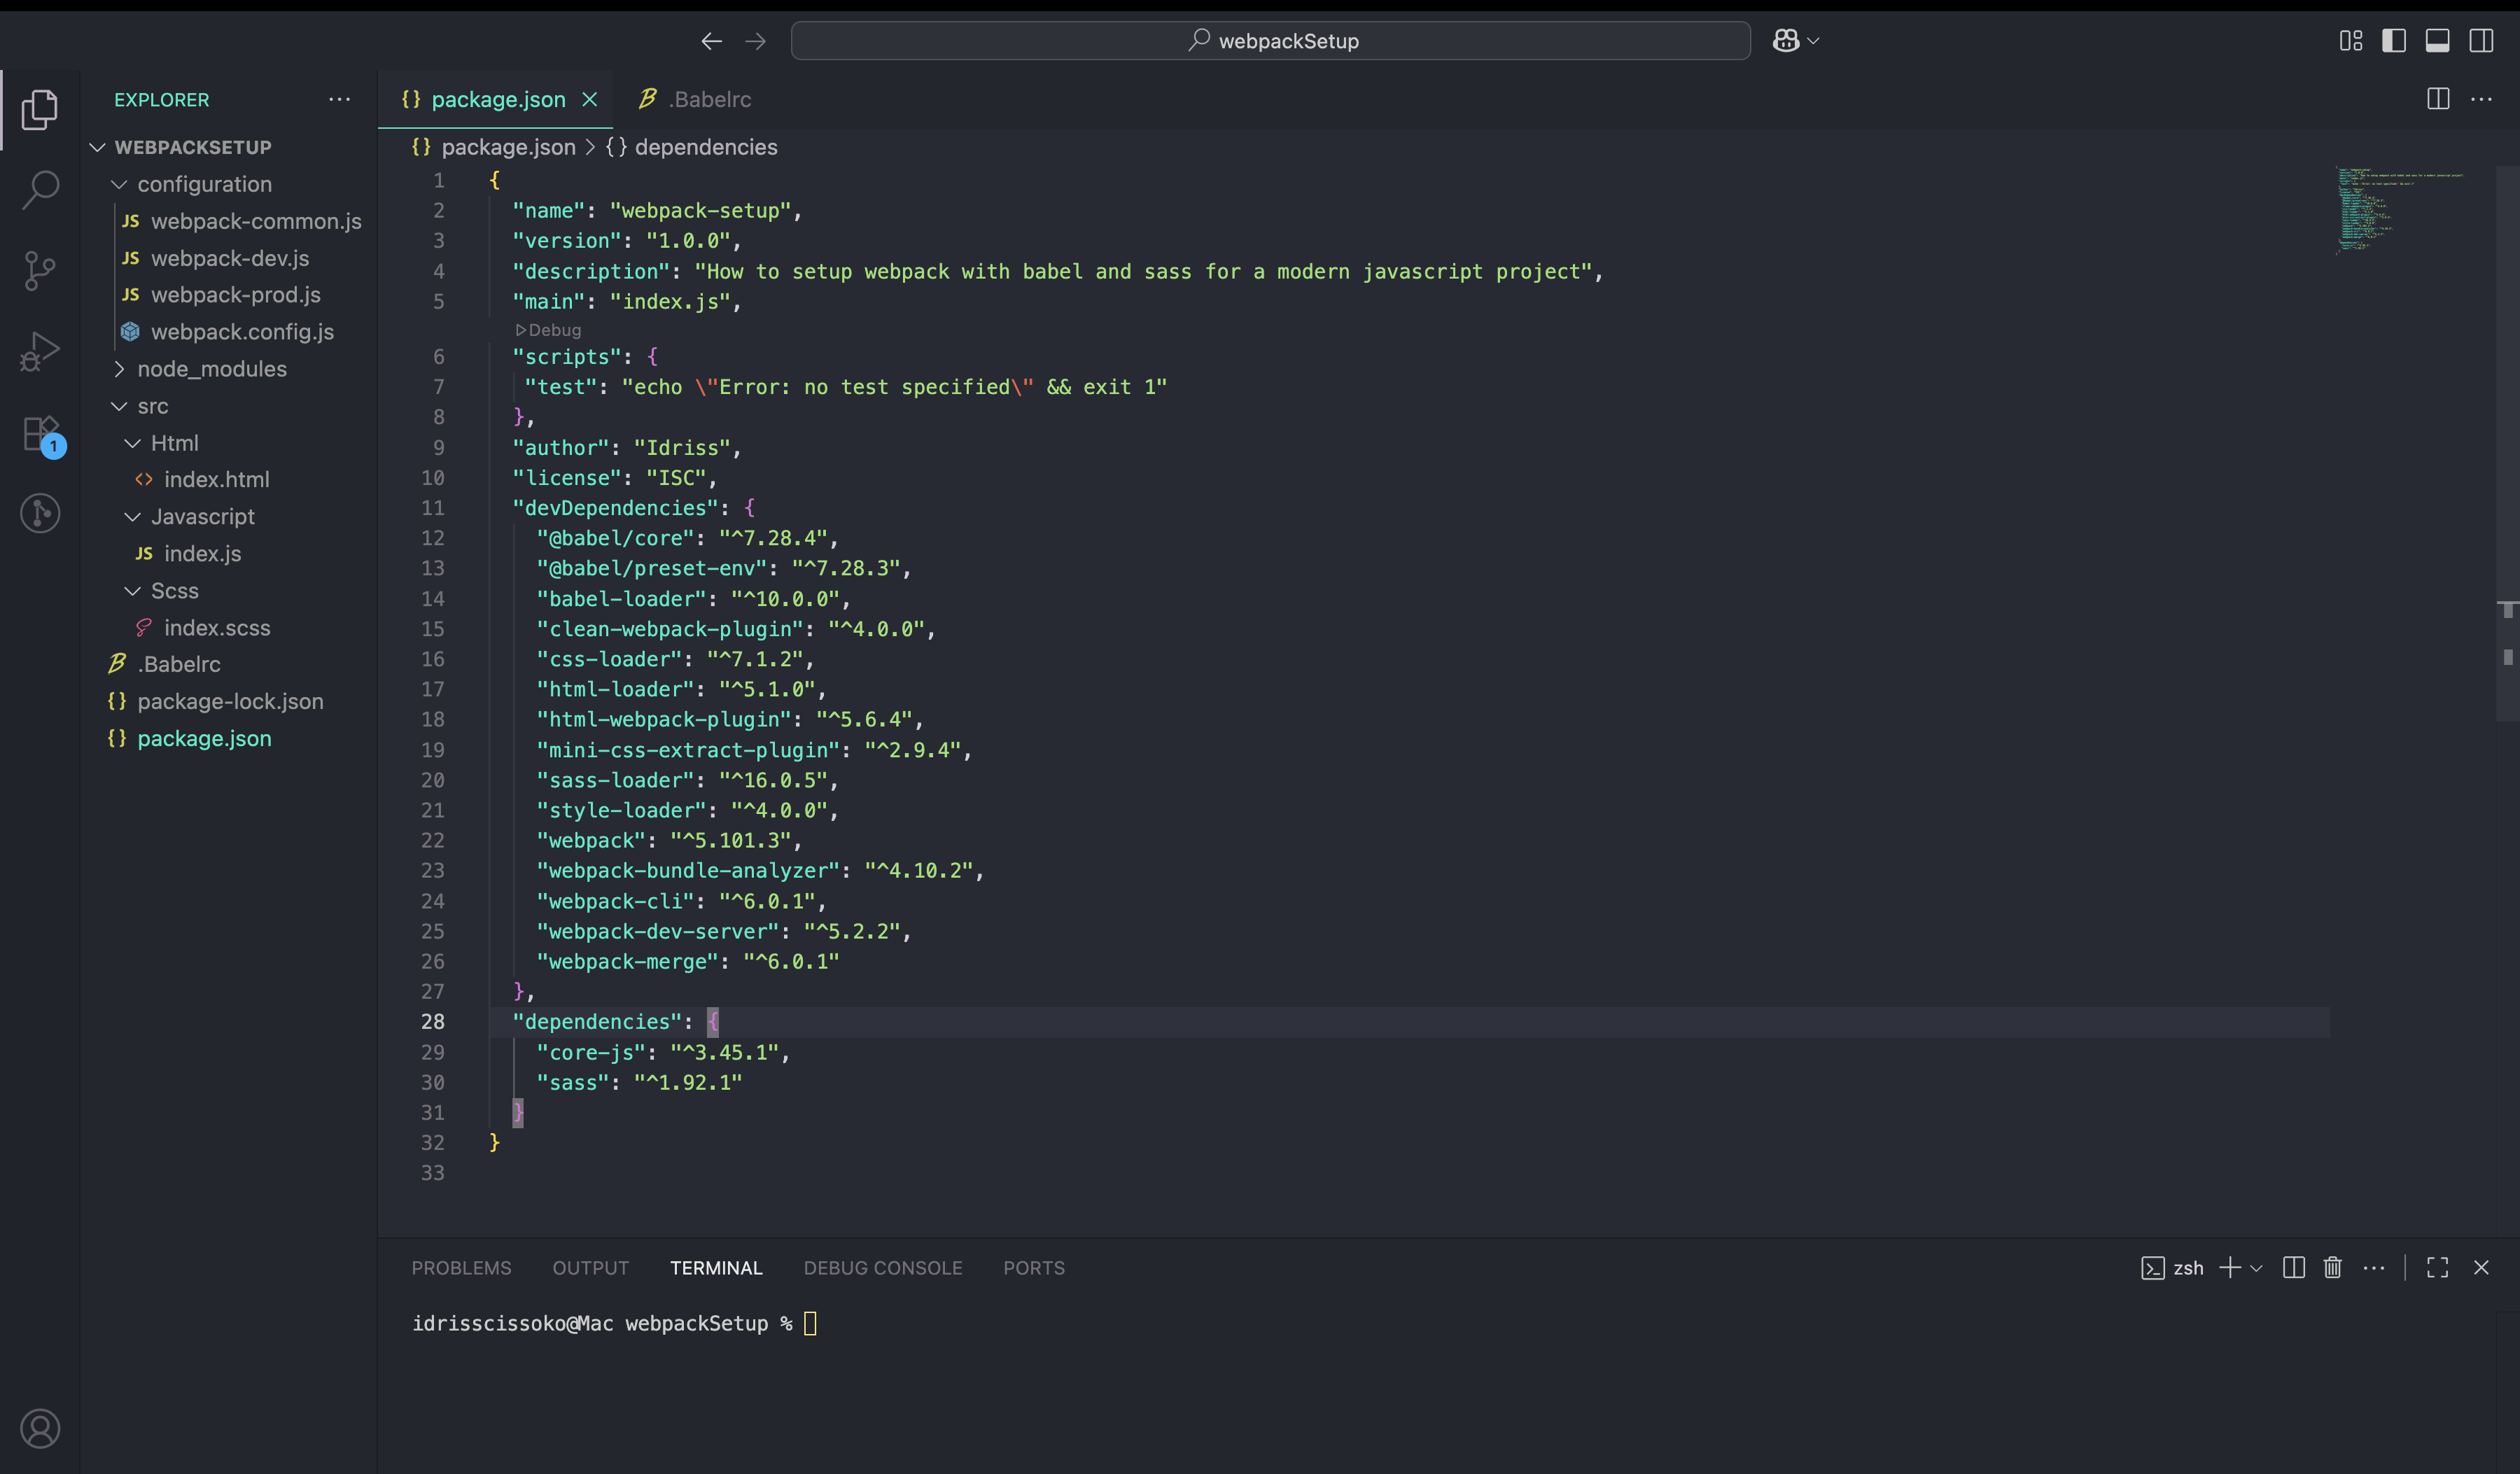
Depending on your project, you will have different dependencies. Since this tutorial is about using sass, We will need to install it, and also core-js. Core-js provides polyfills for modern JavaScript features, and it’s what Babel relies on for polyfill support.
npm install --save core-js sass
Our package.json now looks like this.
Configuration and Setup
Babel
To configure Babel we need to create a .Babelrc file, in the root folder of our application. With that file We’ll specify which Babel plugins and presets to use for code transformation and the environment targets.
{
  "presets":[
    ["@babel/preset-env",
    {
      "targets":"defaults",
      "useBuiltIns" : "usage", // tells Babel to include only the polyfills we use in the app
      "corejs":"3.45.1" // specifying the corejs version to use for the polyfills. version taken from package.json
    }
  ]]
}
The previous code is the content of our .Babelrc file. A simple Object that specifies which presets to use. In our case @babel/preset-env.
We then set it to target the default browsers, giving us broad coverage. You can also adjust it based on your needs. If you targeting internet explorer 11 for example that’s where you will specify it.
Webpack
webpack.config.js
Inside our webpack.config.js file We’ll write the following code.
// import dependencies
const { merge } = require("webpack-merge");
const commonConfig = require("./webpack-common.js");

// merge common config and environment or throw error when it fails
module.exports = ({ env }) => {
  try {
    if (!env) throw new Error("No environment specified");
    const environmentConfig = require(`./webpack-${env}.js`);
    return merge(commonConfig, environmentConfig);
  } catch (error) {
    console.log(error.message);
    process.exit(1);
  }
};
The previous code:
- is importing webpack-merge, our common configuration , and the current environment configuration.
- If no environment is set or an error occurs, throw an error, inform the user, and exit the process.”
- success ? merge both common config and environment config and returns it.
webpack-common.js
A webpack configuration is basically an object having the following keys:
- entry : tells webpack how to begin bundling our app or a specific file.
- output : where that entry file will be saved, and its characteristics
- plugins : Here we specify all the plugins we want to use, to expend our app’s functionality.
- optimization : How do we want to optimize those files
- modules.rules : Here we tell Webpack how to handle different type of files.
A configuration can/should contains a mode (production/development), a devtool and a development server. Which We will have for both environments, not in the common configuration.
// webpack common dependency for production and development
const path = require("path");
const HtmlWebpackPlugin = require("html-webpack-plugin");
const { CleanWebpackPlugin } = require("clean-webpack-plugin");
const BundleAnalyzerPlugin =
  require("webpack-bundle-analyzer").BundleAnalyzerPlugin;

// export webpack default config
module.exports = {
  entry: {
    index: {
      import: path.resolve(__dirname, "..", "./src/javascript/index.js"),
    },
  },
  output: {
    path: path.resolve(__dirname, "..", "./build"),
    filename: "js/[name].[contenthash:8].js", // cache file name so browser download new files everytime
    chunkFilename: "js/[name].[contenthash:8].js", // cache file name for chunks
  },
  optimization: {
    splitChunks: { chunks: "all" }, // separate bundles for shared code
  },
  plugins: [
    new CleanWebpackPlugin(),
    new BundleAnalyzerPlugin(),
    new HtmlWebpackPlugin({
      template: path.resolve(__dirname, "..", "./src/html/index.html"),
      filename: "index.html",
      chunks: ["index"],
      inject: "body",
    }),
  ],
  module: {
    rules: [
      // babel loader to compile
      {
        test: /\.(js)$/,
        exclude: /node_modules/,
        use: ["babel-loader"],
      },
      //json
      { test: /\.json$/, type: "json" },
      // Images
      {
        test: /\.(?:ico|gif|png|jpg|jpeg|mp4)$/i,
        type: "asset/resource",
      },
      // Fonts and SVGs
      {
        test: /\.(woff(2)?|eot|ttf|otf|svg)$/,
        type: "asset/inline", // we want small files to be base64 encoded to improve performance
      },

      {
        test: /\.(html)$/,
        exclude: /node_modules/,
        use: {
          loader: "html-loader",
          options: {
            sources: {
              list: [
                "...", // important, to correctly handle the default tags like 'src'
                {
                  tag: "img",
                  attribute: "data-src",
                  type: "src",
                },
              ],
            },
          },
        },
      },
    ],
  },
};
webpack-dev.js
For our development configuration, We will tell webpack to use its built-in development optimizations by specifying the mode. Create a development server, and create source maps, so we can debug easily. A source map is basically retracing the bundled code back to the original source code, so we can see exactly where an error occurred.
const path = require("path");
module.exports = {
  mode: "development",
  devtool: "eval-source-map", // create a source map for easier debugging. so we see the original code in the browser devtools.
  // configuration for our dev server
  devServer: {
    static: path.resolve(__dirname, "./src"), // serve files from our src folder
    hot: true, // reloads instantly when changes are made
    port: 8080,
  },
  module: {
    rules: [
      // Styles: Inject CSS into the head with source maps for development
      {
        test: /\.(scss|css)$/,
        use: [
          "style-loader",
          {
            loader: "css-loader", //interprets @import and url() like import/require() and will resolve them
            options: { sourceMap: true, importLoaders: 1, modules: false },
          },

          { loader: "sass-loader", options: { sourceMap: true } }, // compiles sass to css
        ],
      },
    ],
  },
};
webpack-prod.js
For production We’ll optimize our css and create a better source map.
// configuration/webpack-prod.js
const MiniCssExtractPlugin = require("mini-css-extract-plugin");

module.exports = {
  mode: "production",
  devtool: "source-map", // create a better quality source map for production
  module: {
    rules: [
      {
        test: /\.(scss|css)$/,
        use: [MiniCssExtractPlugin.loader, "css-loader", "sass-loader"], // extracts css into separate files for better performance
      },
    ],
  },
  plugins: [
    new MiniCssExtractPlugin({
      filename: "styles/[name].[contenthash:8].css", // caching 8 characters from the hash.
    }),
  ],
  optimization: {
    // optimize and minimize the output files for better performance.
    minimize: true,
    splitChunks: { chunks: "all" },
    runtimeChunk: "single",
  },
};
With everything in place We can move to creating the commands to run, so that we can start developing our application.
Development and Production commands.
How to configure package.json to launch our app and create production builds ?
To launch and create builds We will add the following scripts to our package.json
 "start": "webpack serve --config configuration/webpack.config.js --env env=dev",
 "build": "webpack --config configuration/webpack.config.js --env env=prod"
Our package.json will now look like this:
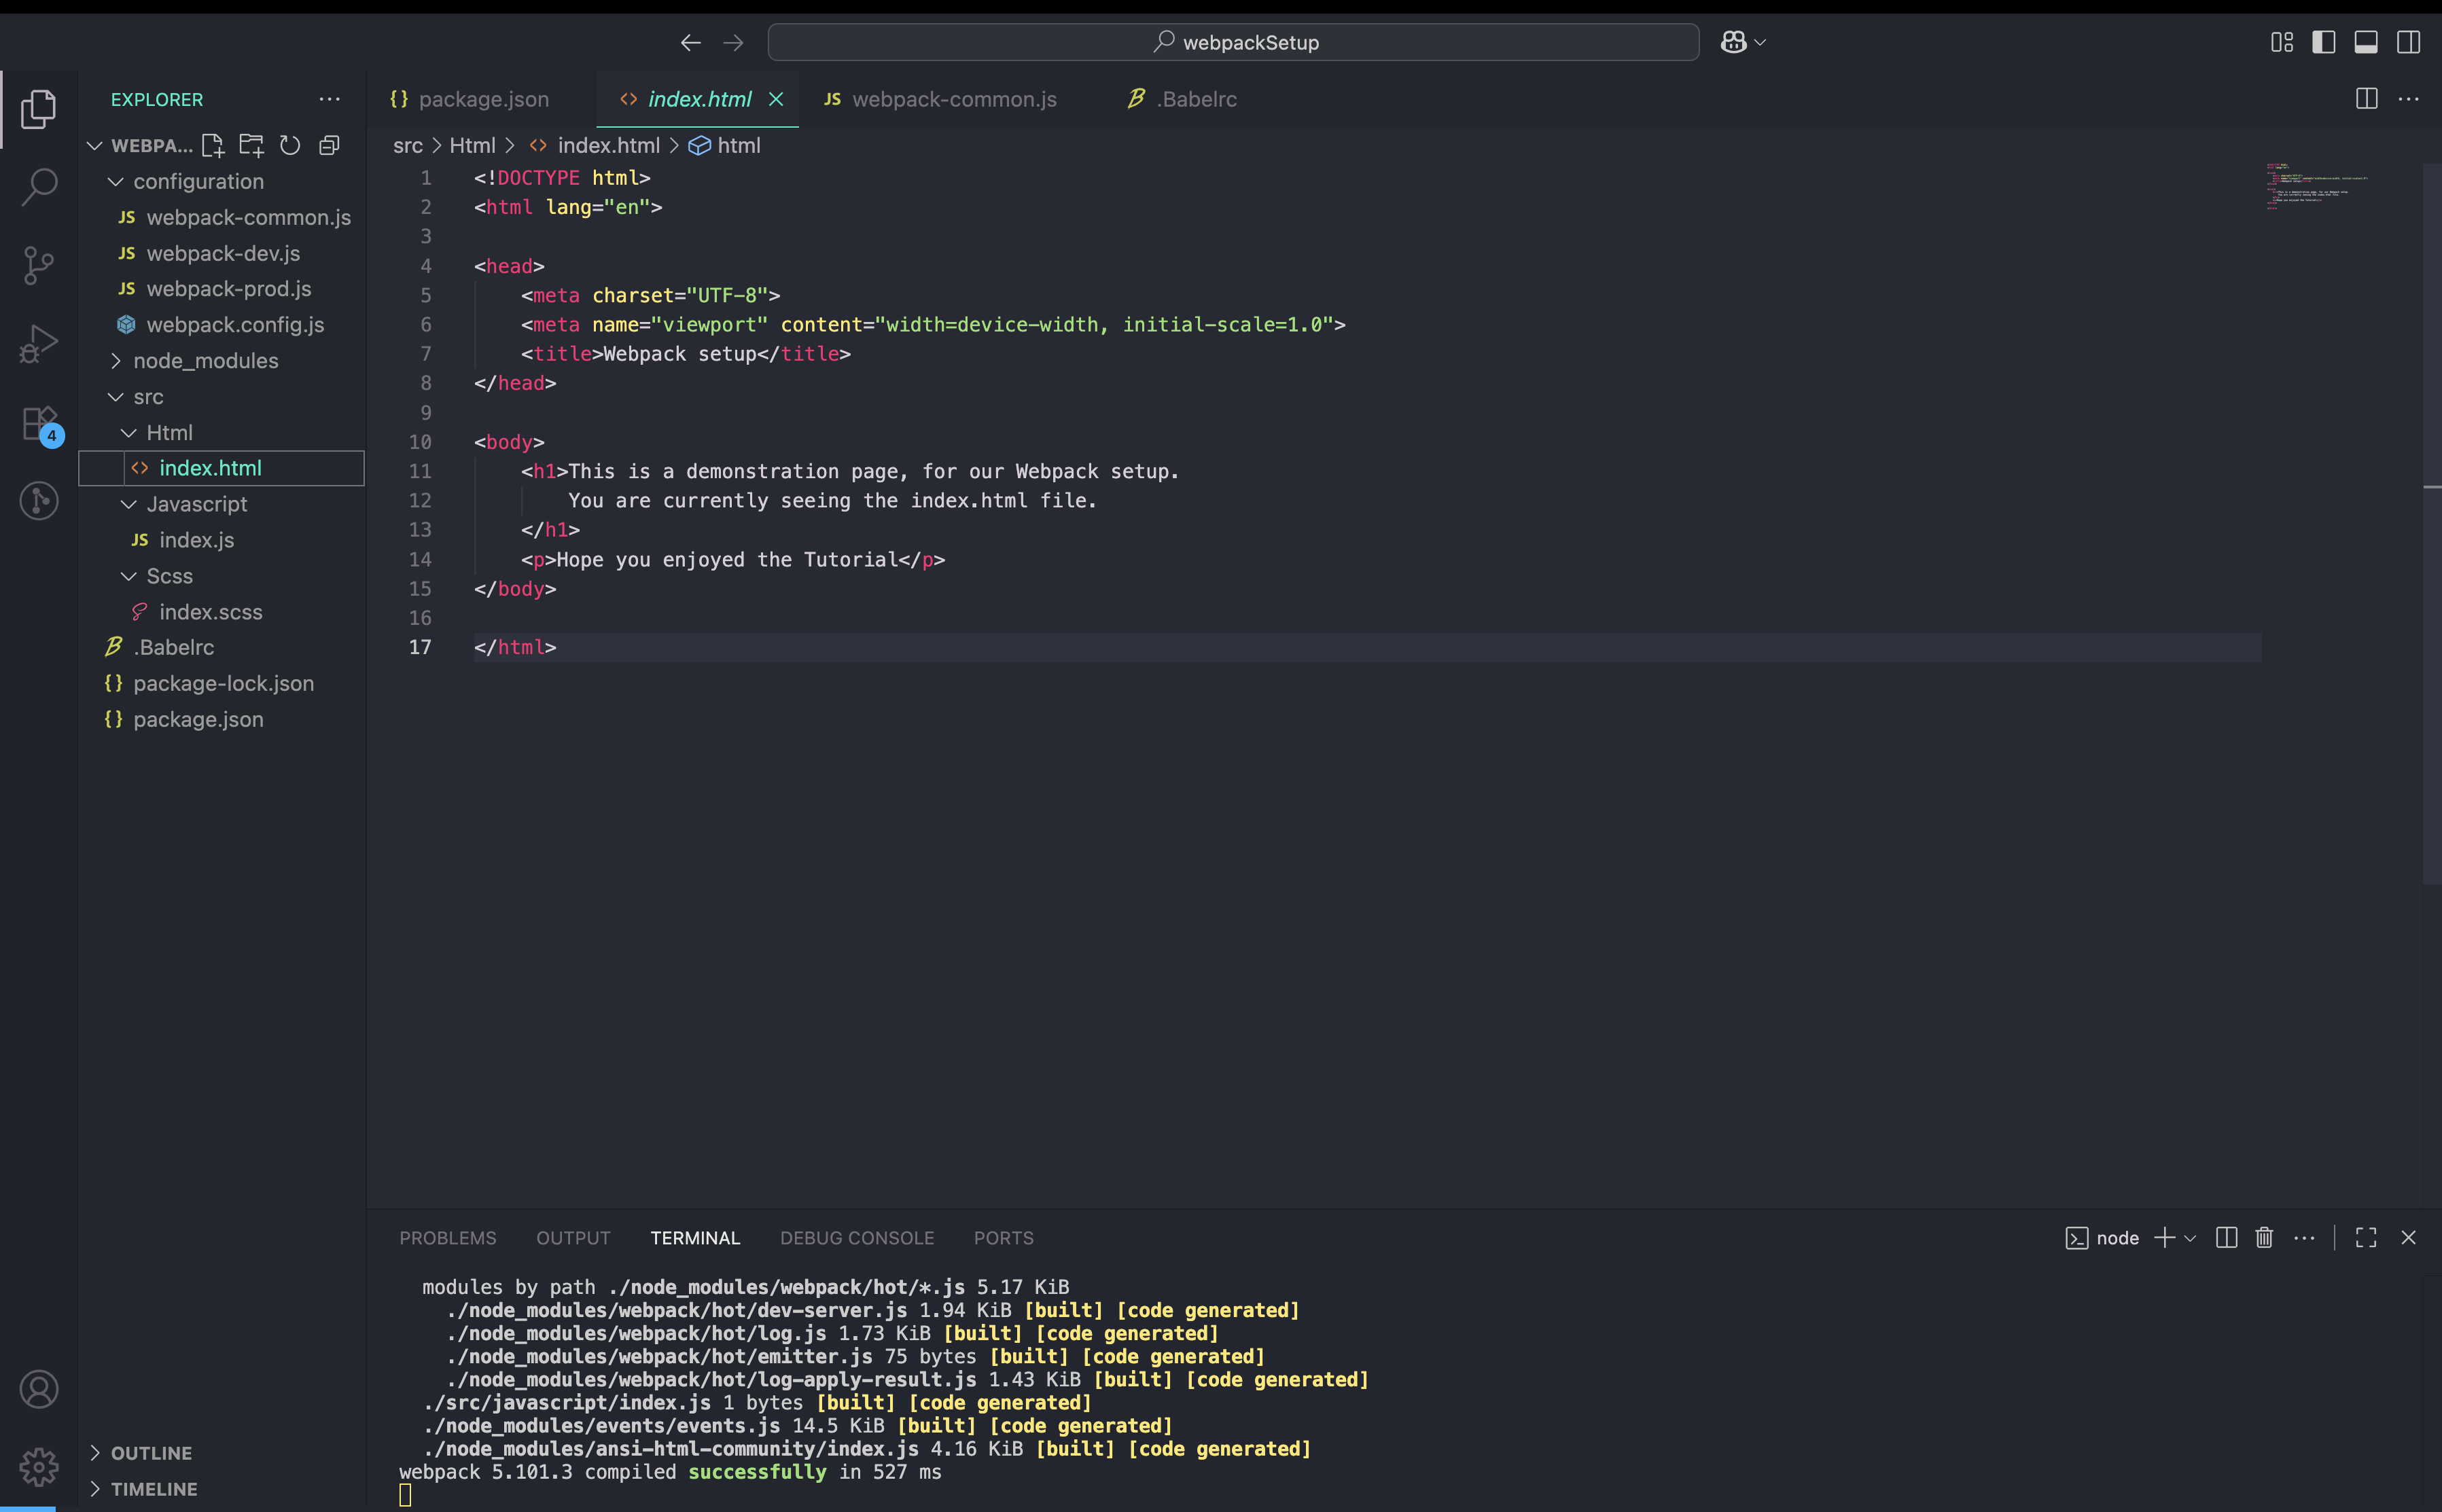
Next We’ll add some texts to our index.html file add some styles and run our development server.
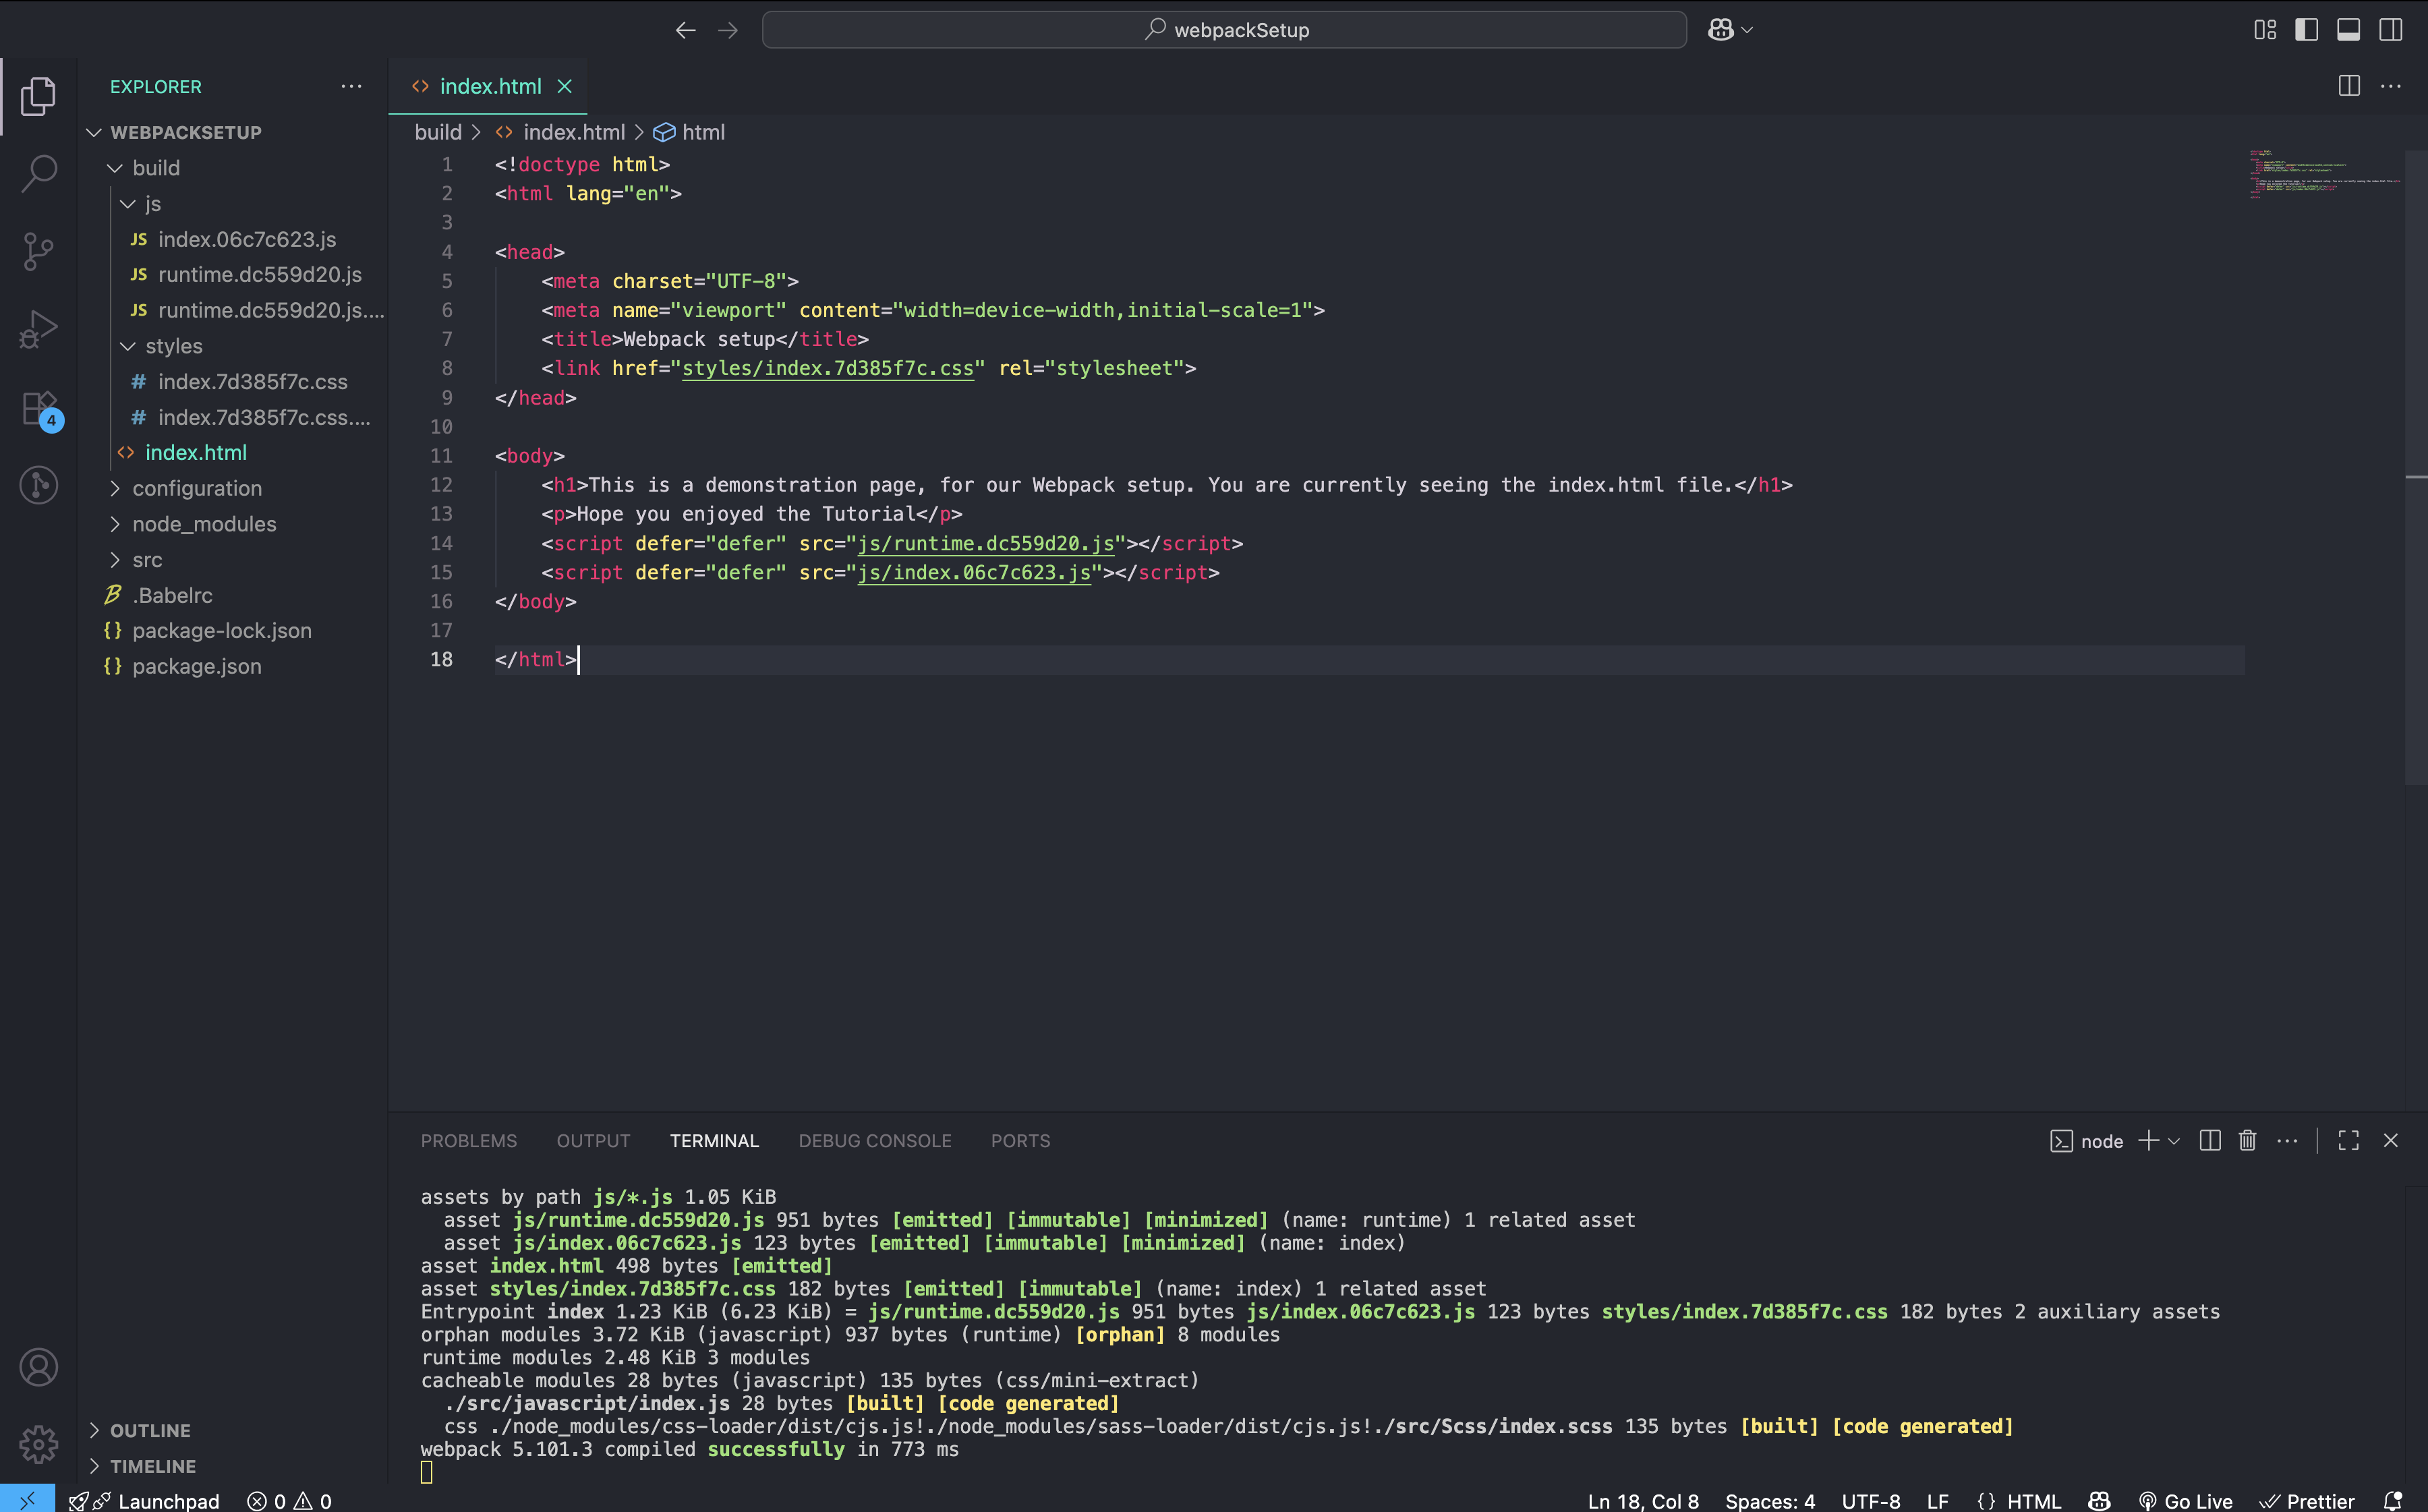
index.html:
Let’s start the development server with:
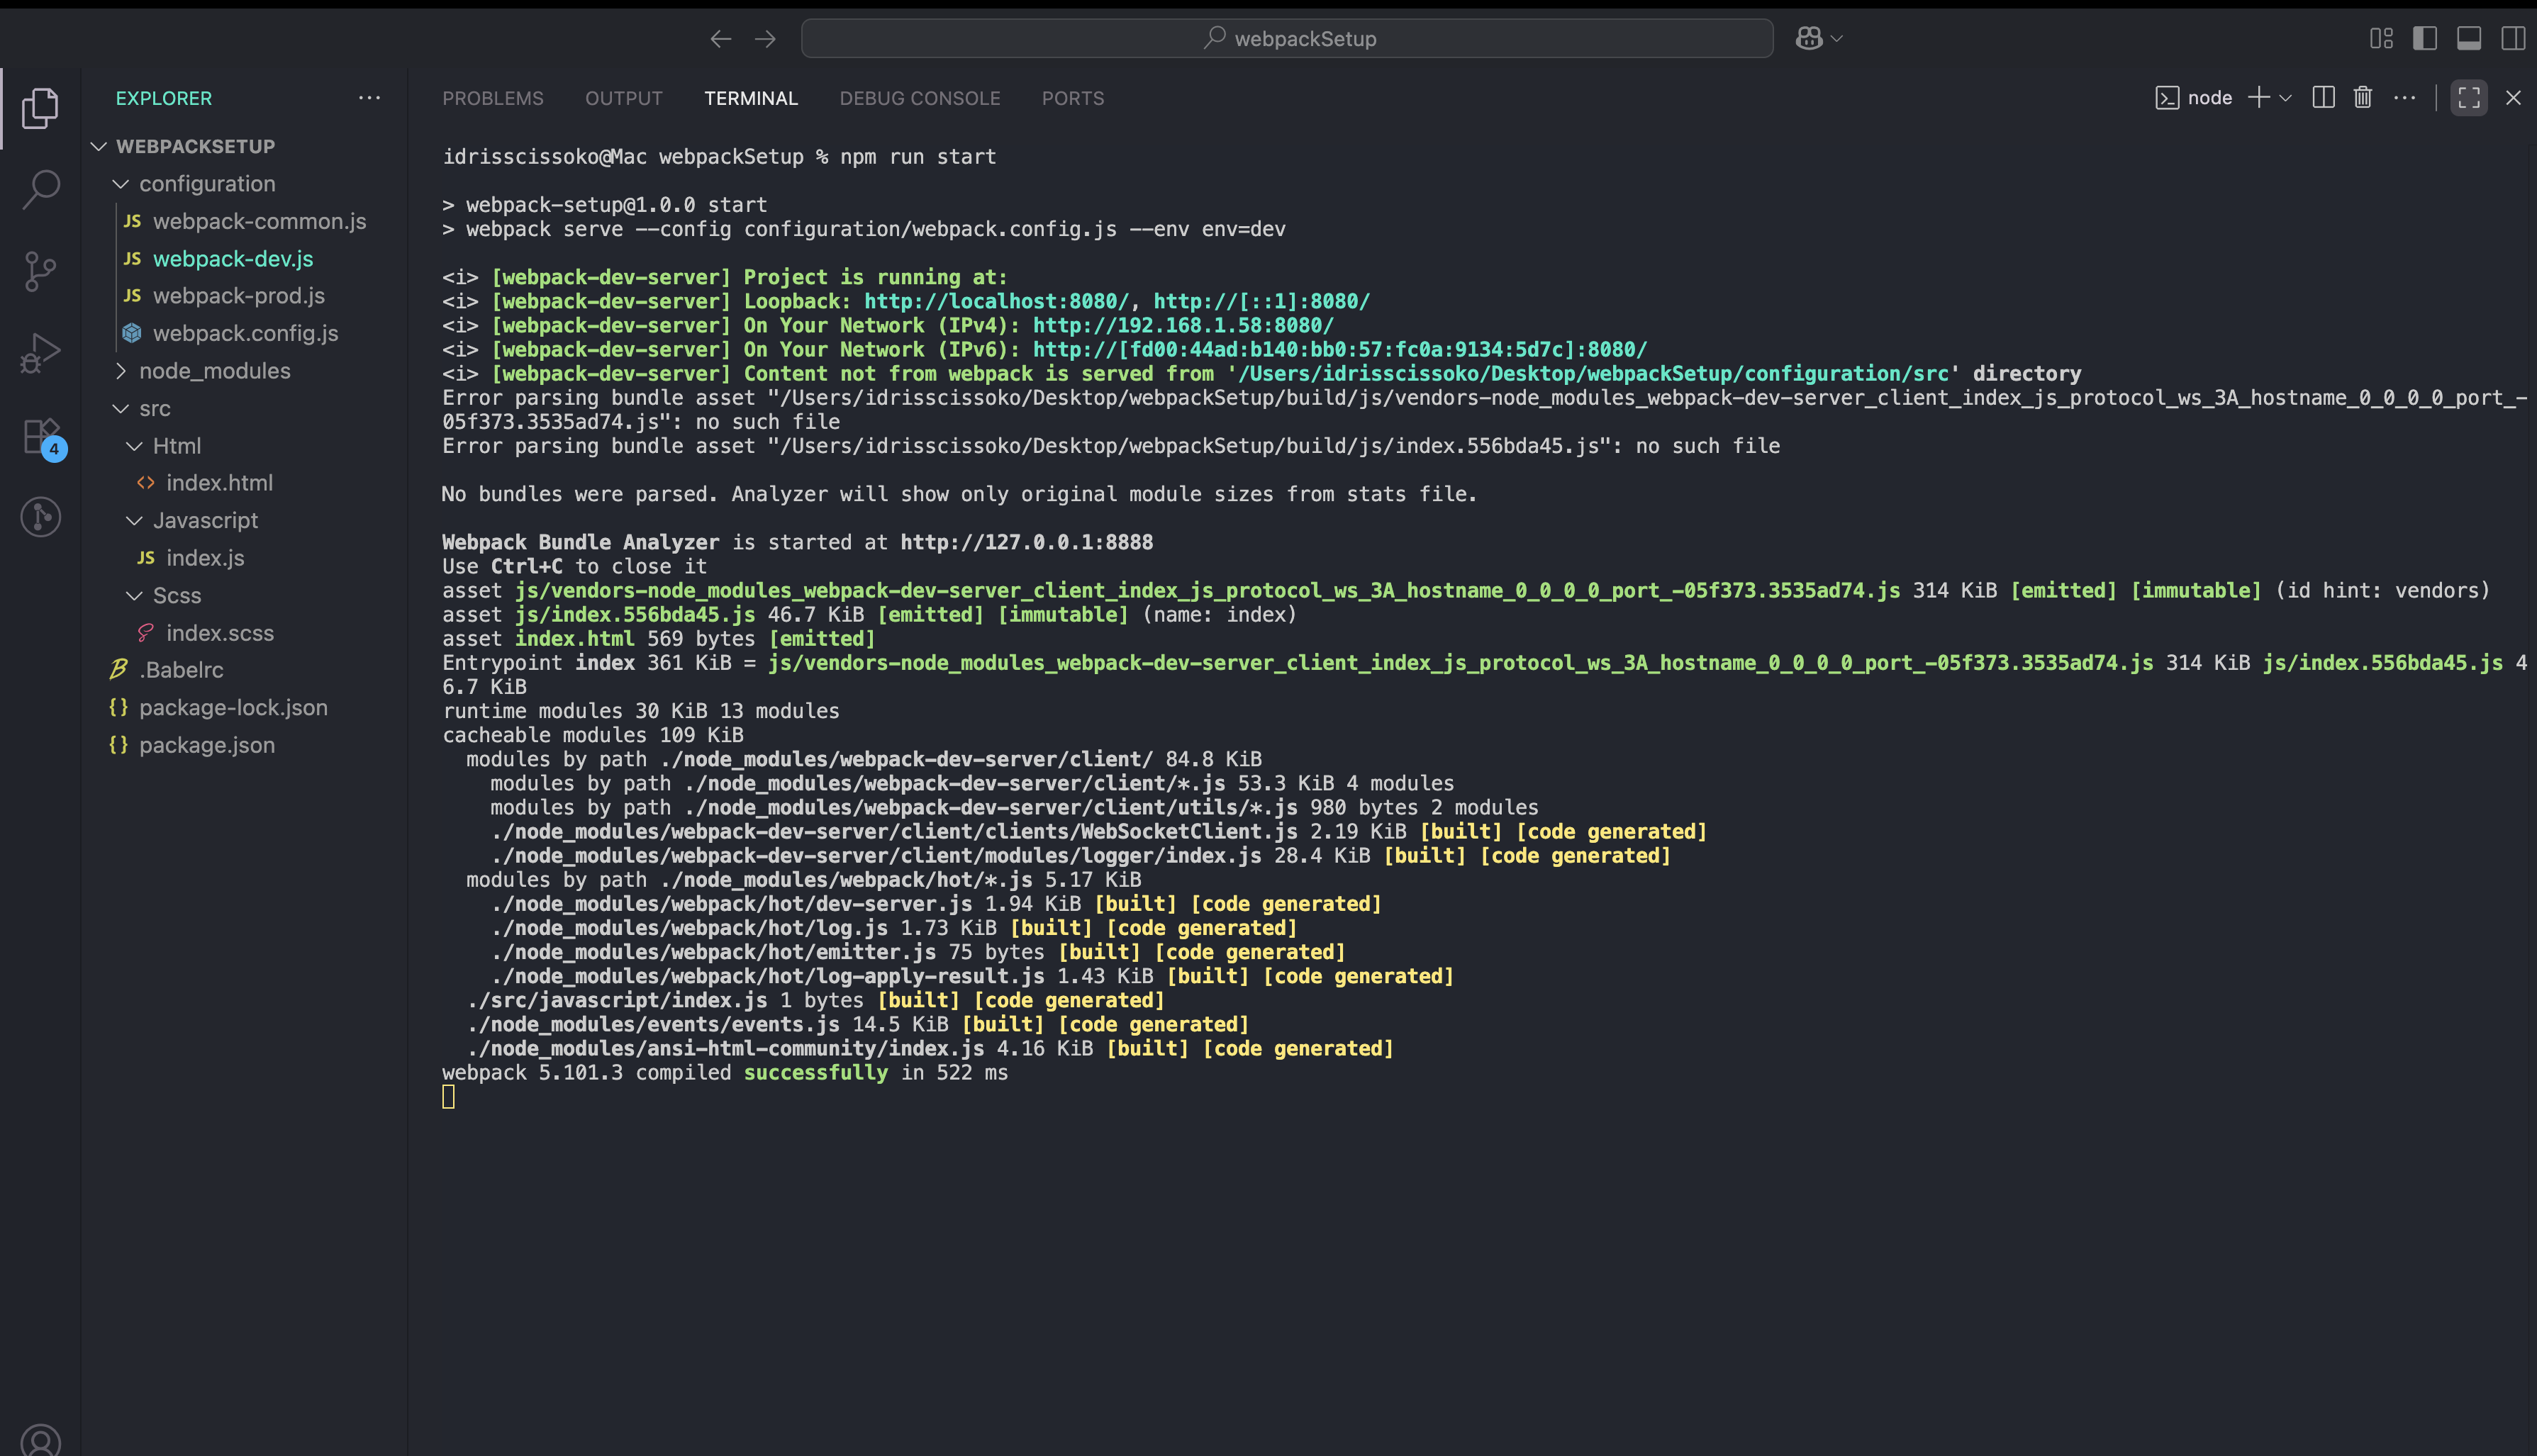
npm run start
We’ll get the following:
In the terminal:
Treemap generated
our index.html output
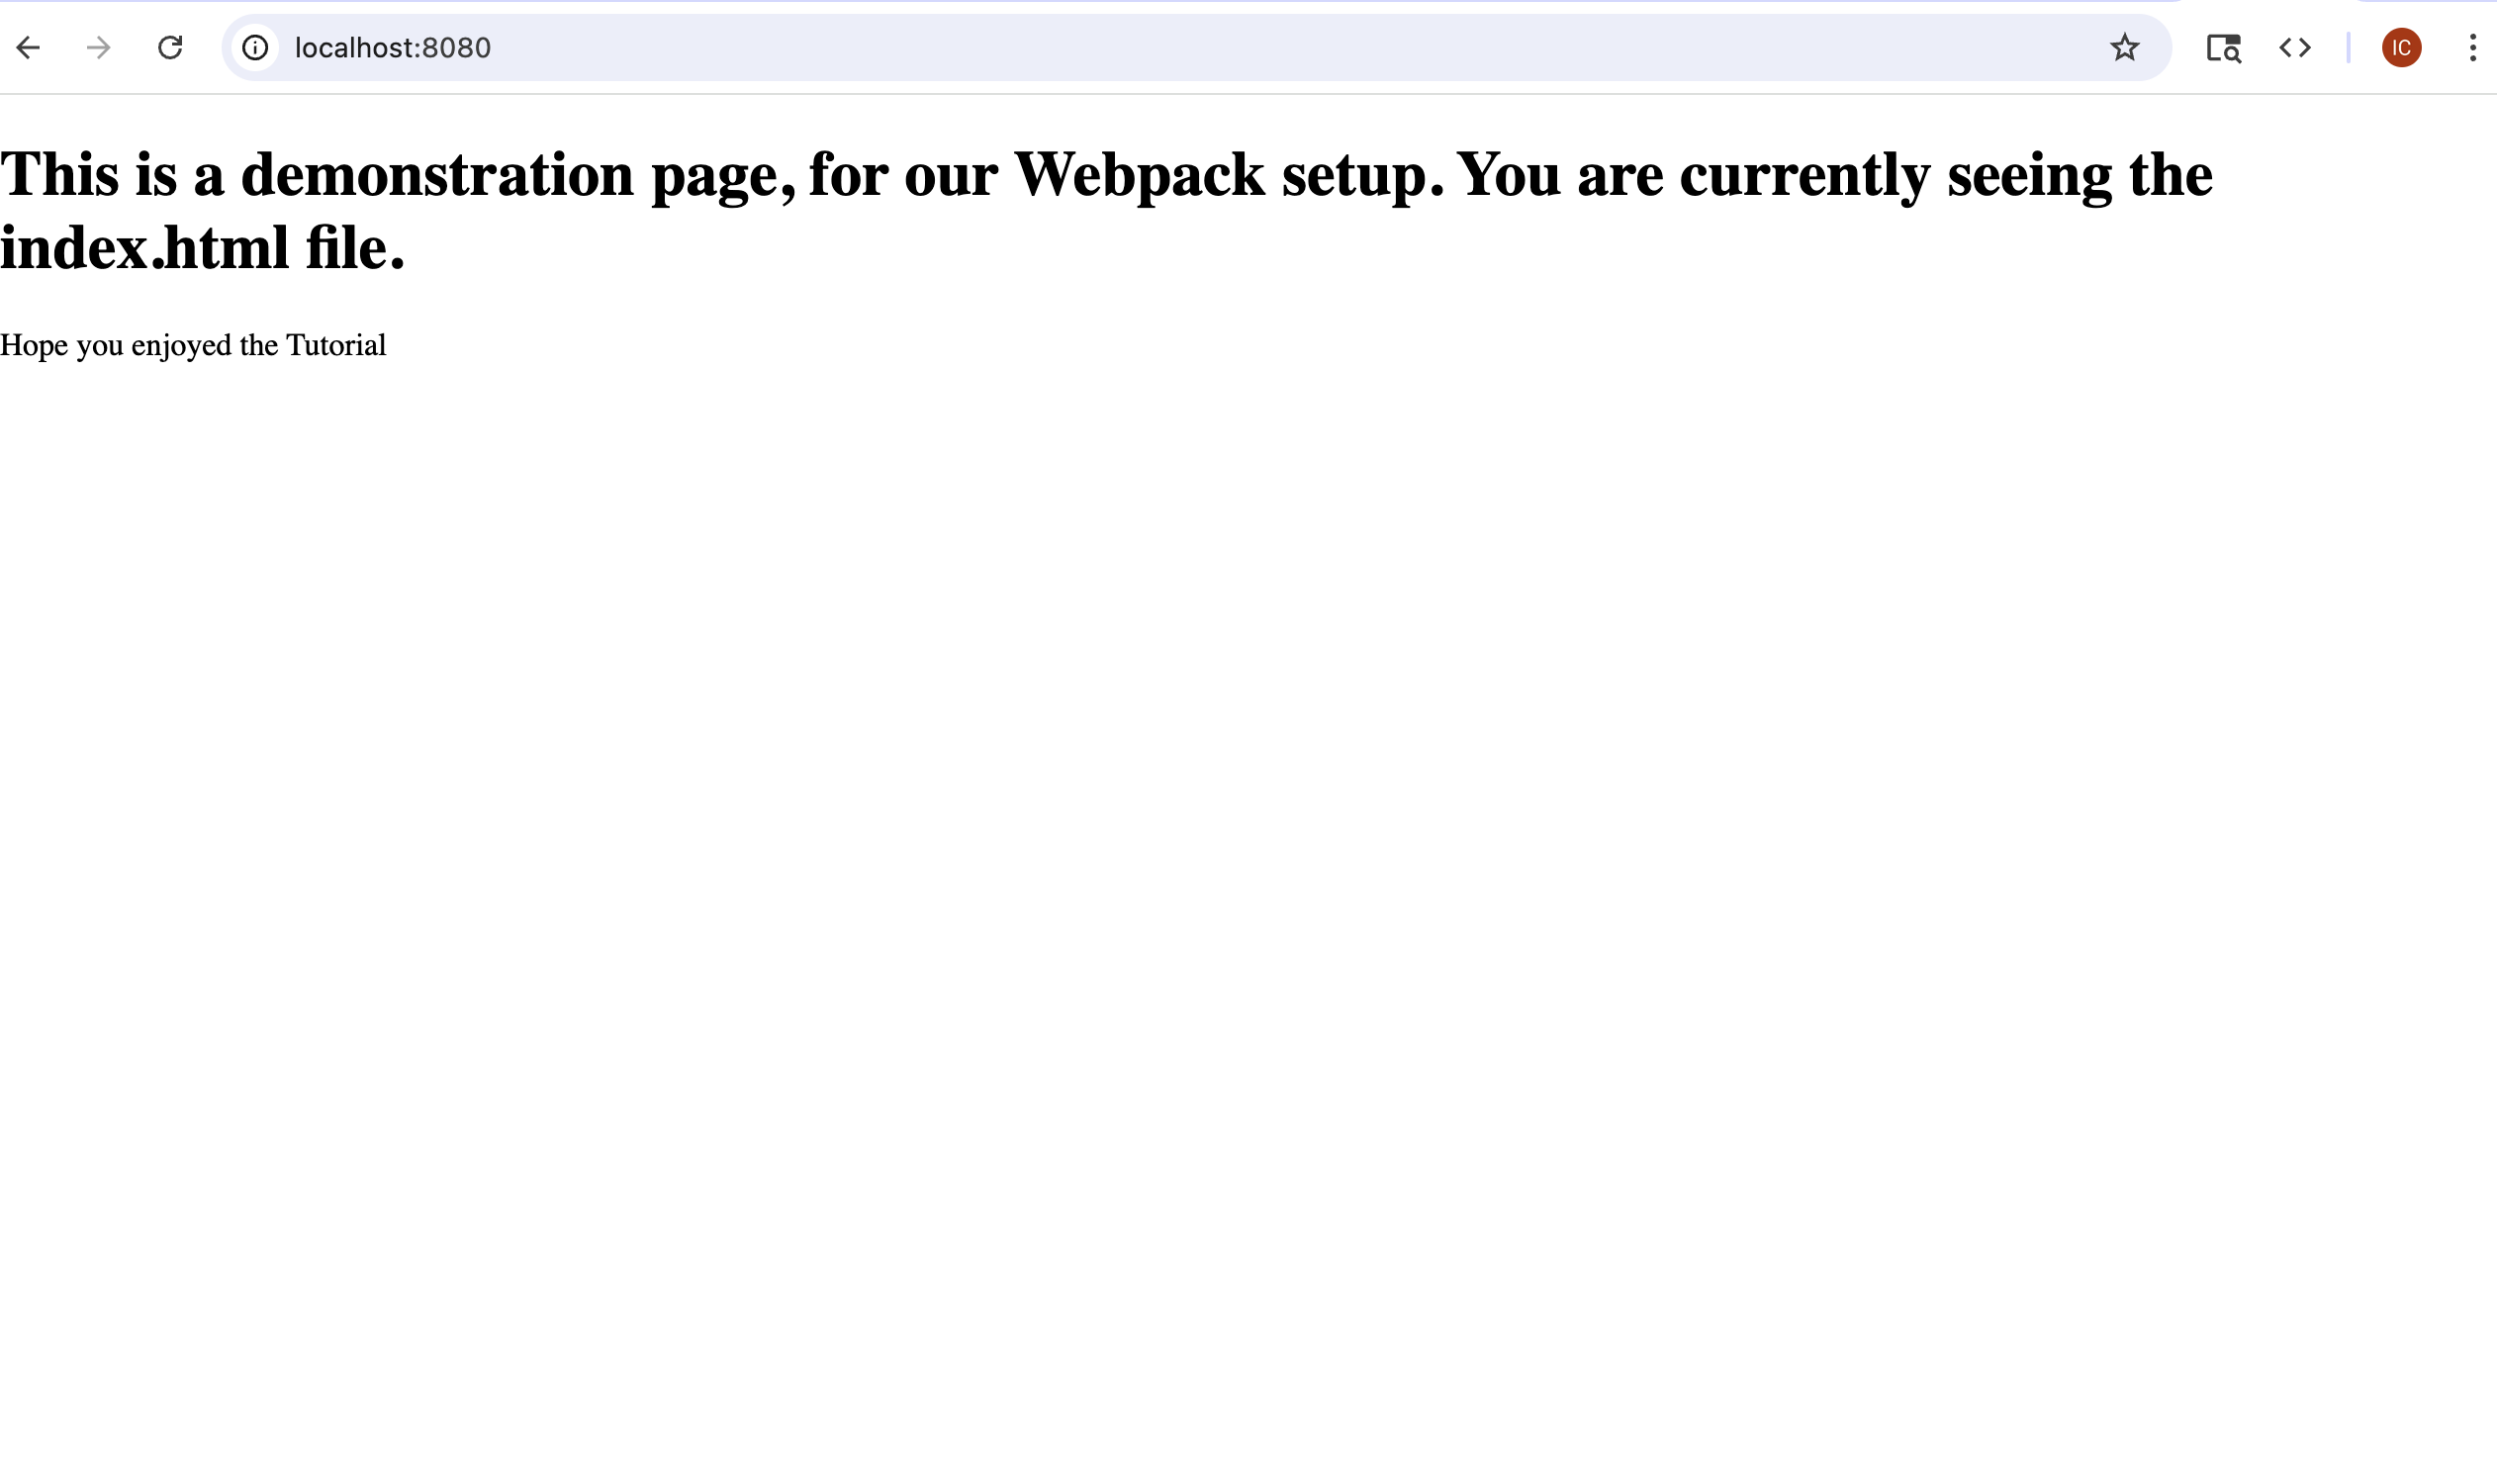
Our index page does not look exciting right now with no style. So Let’s add some style to it.
in our index.scss we will add the following:
body {
  margin: 0;
  padding: 0;
  font-family: Arial, Helvetica, sans-serif;
  width: 50vw;
  height:100vh;
  margin: 4rem auto;
  background-color: whitesmoke;

  h1 {
    color: blue;
  }
}
To see the changes We can import our index.scss file into our index.js file like this
index.js
import "../Scss/index.scss";
And voila, our page now looks like this:

Creating builds
Now to create a production build all we need to do, is run the following command in the terminal
npm run build
We’ll get the following output.
New treemap
And a new build folder containing all the optimized file ready to deploy.
With this setup, you can build, test, and deploy modern JavaScript apps with confidence.